duinsel
-
Posts
5 -
Joined
-
Last visited
duinsel's Achievements
")


-
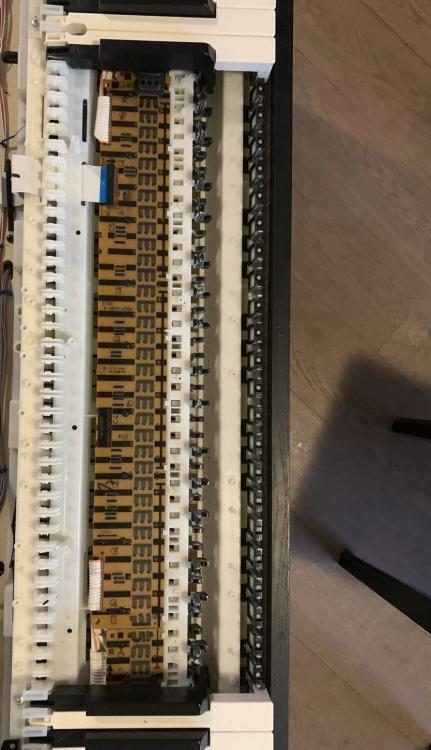
Whoop, I did it again... Another key on my piano failed in the same way as the other key 5 yrs ago. I have proceeded to fix this key in the same way as before, but figured out that some of the steps I took last time around are not strictly required, so I was done quicker and easier this time around. Again, I thought it would be useful to share (and I was happy to read that other users found my previous post useful, thanks for leaving a comment!) As before, I started by taking out the hinged lid, the back/top panel and the sliding keyboard cover. Next, I disconnected the flex cable to the control panel, and removed the center segment holding all controls. The side segments I left connected (solder joints to the speaker elements...). Different than last time, I left the plastic keyboard assembly inside the wooden cabinet, that saves a bunch of hassle and reduces chances of accidental damage. It is necessary to undo the screws that hold it in though, as we need to shift the assembly a bit before we can remove the keys. I undid the silver screws on the inside that hold the assembly on the wood case, and then also the silver screws on the bottom of the cabinet that do the same. I did not need to remove the electronics box on the bottom, but I have a feeling I forgot to put a screw back in located under that box last time, so maybe others need to remove that box for access to these screws. Once the keyboard assembly is loose it can slide back a cm or so, be careful for the wires going through the bottom panel. Undo the brackets near the hinges of the keys, once free a white key can be pried out at the hinge, and when white is out the blacks can come out as well. I put the keys aside in the order they came out to help reassemble. Now I had access to the sensor PCB, I chose to remove the three center sensor strips (which included the sensor of my bad key). The contact area on the PCB was cleaned with alcohol, and the silicone rubber contactor strips as well. After drying, assembly was the reverse procedure, a paperclip is still a lifesaver for getting the rubber pins back into the PCB. Fortunately, after assembly the faulty key was fixed, and could be played soft or loud as desired.😅 Let's see if it will last another 5 years like this.

-
Hi Mik, I honestly don't recall. Maybe a different hardware revision? I only took apart the center key block containing the defective one, no preventive maintenance on the rest. No new defects have appeared in the mean time.
-
Hi, great you could fix it, and good to know that the post was helpful, that was the point after all! Mine is still going strong, fingers crossed.
-
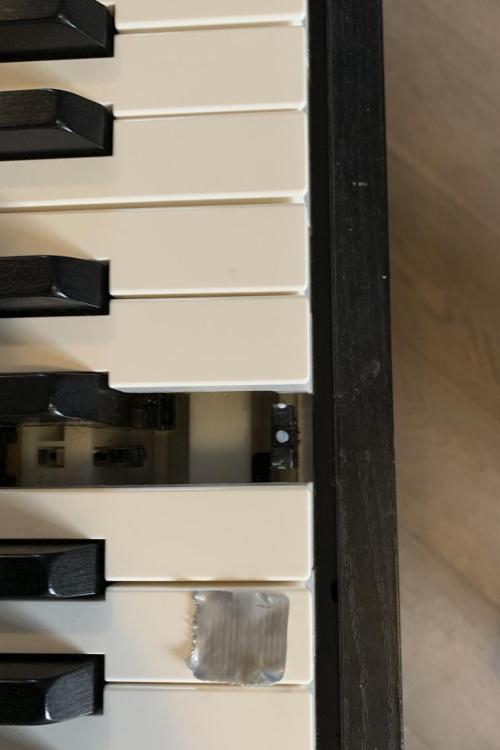
Hi BradMZ. Good point, but yes, I first tried to blow air (from a compressor, you can just see it on the second picture) between the gaps of the keys, that did not help. When I got the back panel off, I next tried to blow from below the keys, that did not help either. After that, I proceeded with disassembly. However, the silicone rubber contact strip seem to be well sealed against the pcb (see the picture with the paperclip), I would have thought air could not reach the contact pads underneath that easily. But a good easy thing to try, as you say it sometimes works. Two things to add to my post above. First, the piano was obviously out of warranty (purchased 2013, >4 yrs old). Second, there was no obvious fouling of the pads, nor something spilled. The picture I took is pre-cleaning. I did remove some dark residue by cleaning, but this was the same for the good keys and the bad key.
-
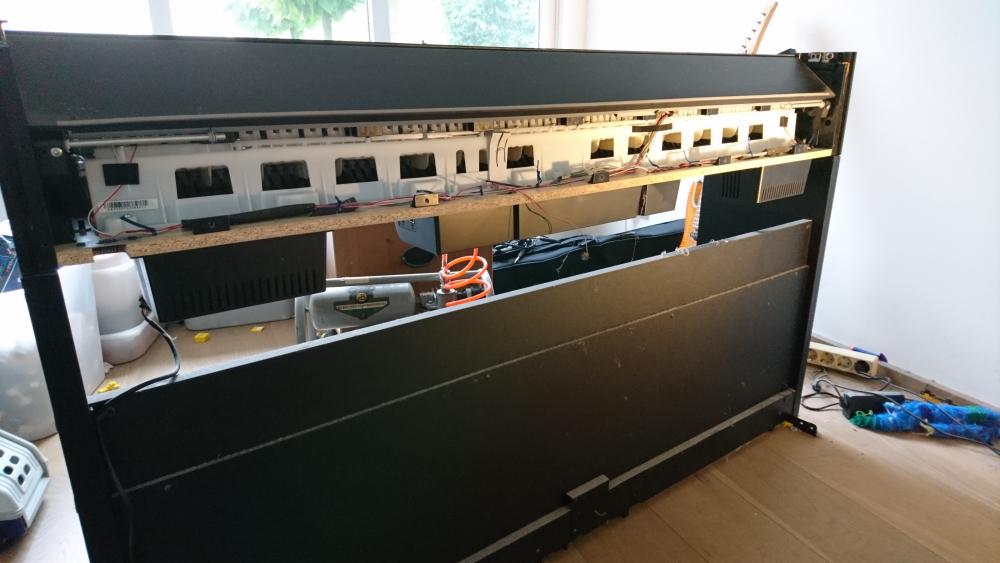
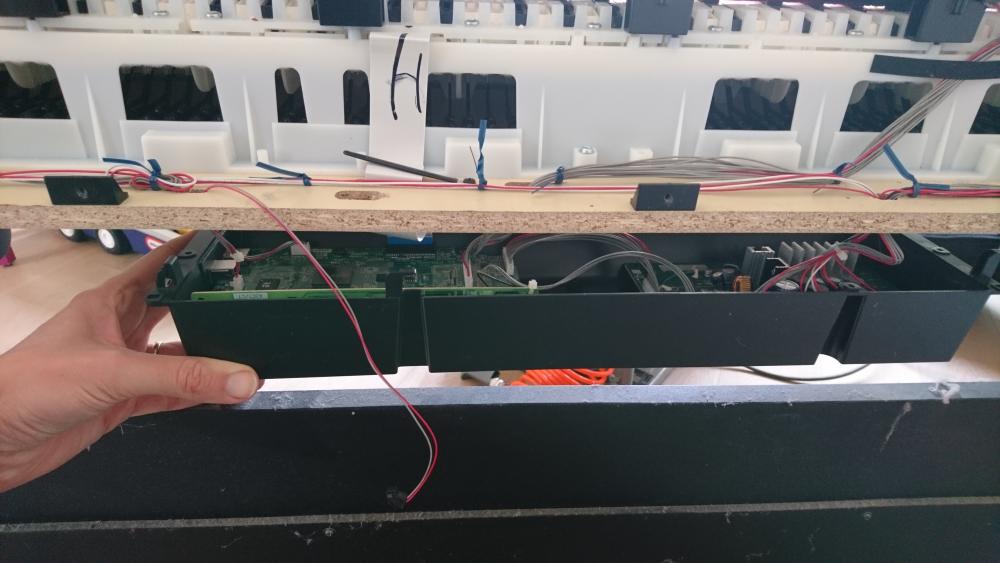
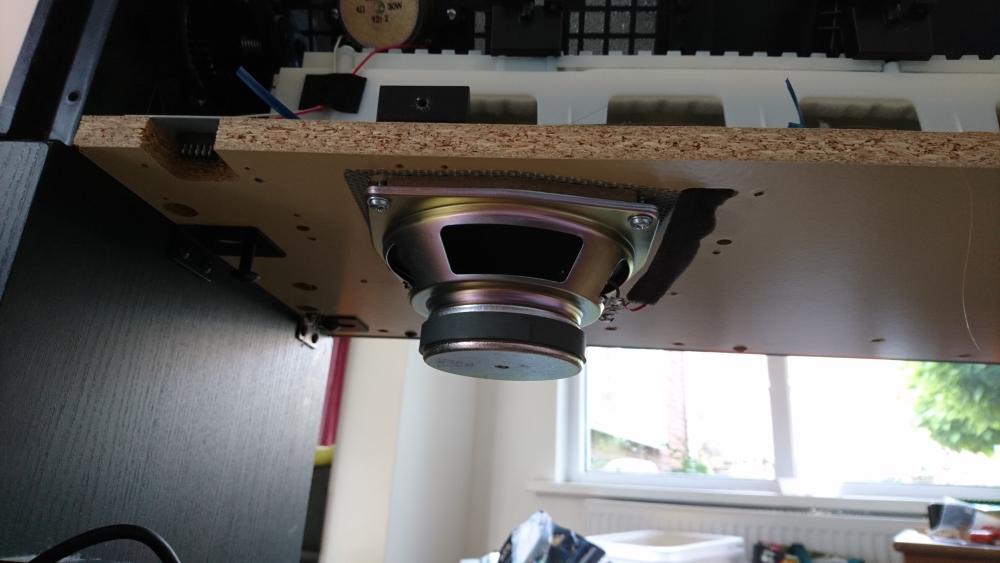
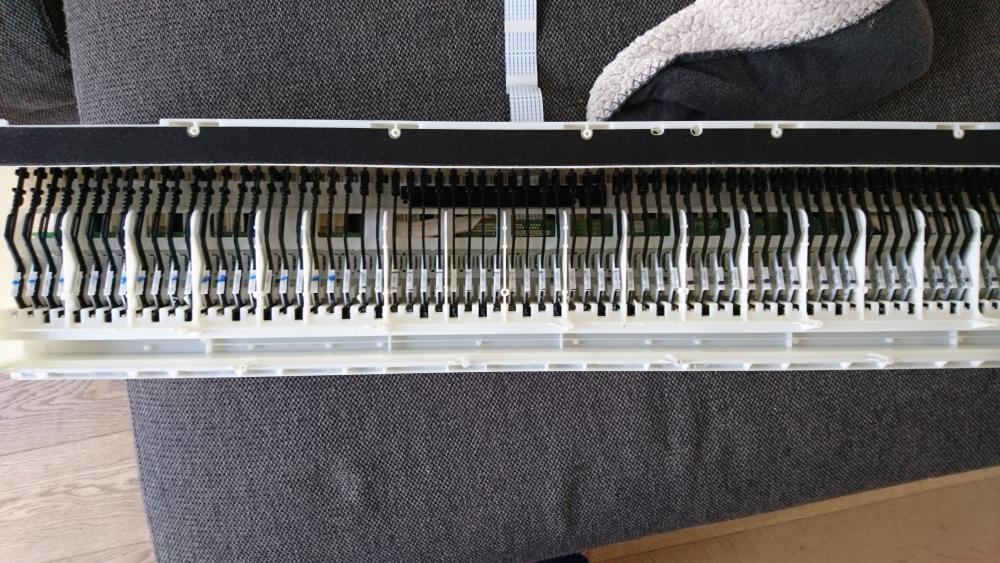
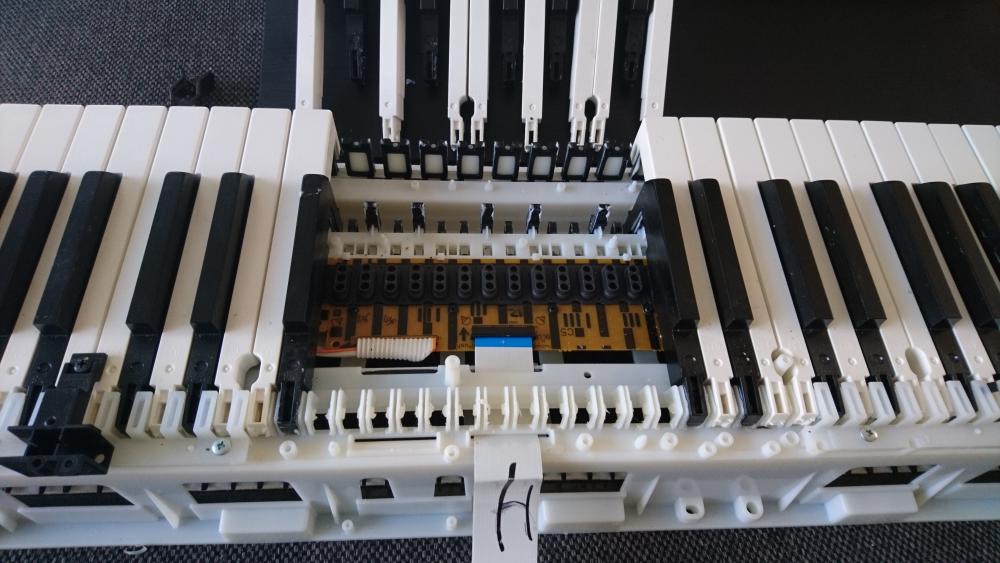
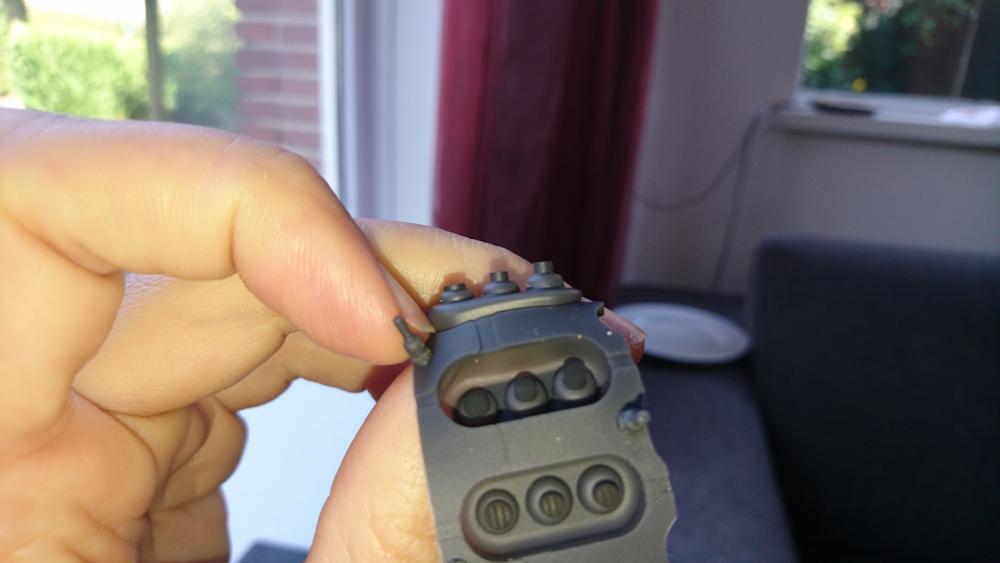
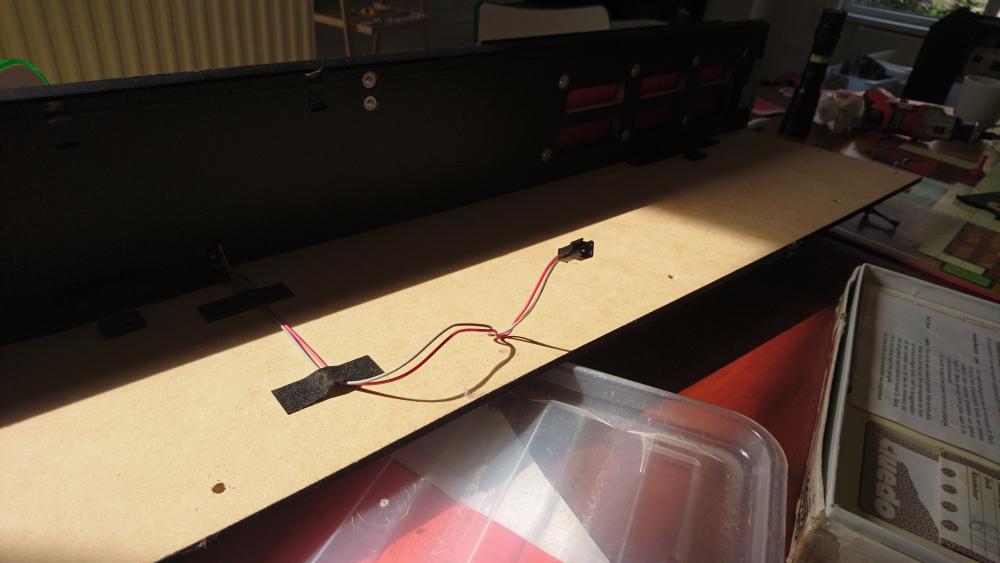
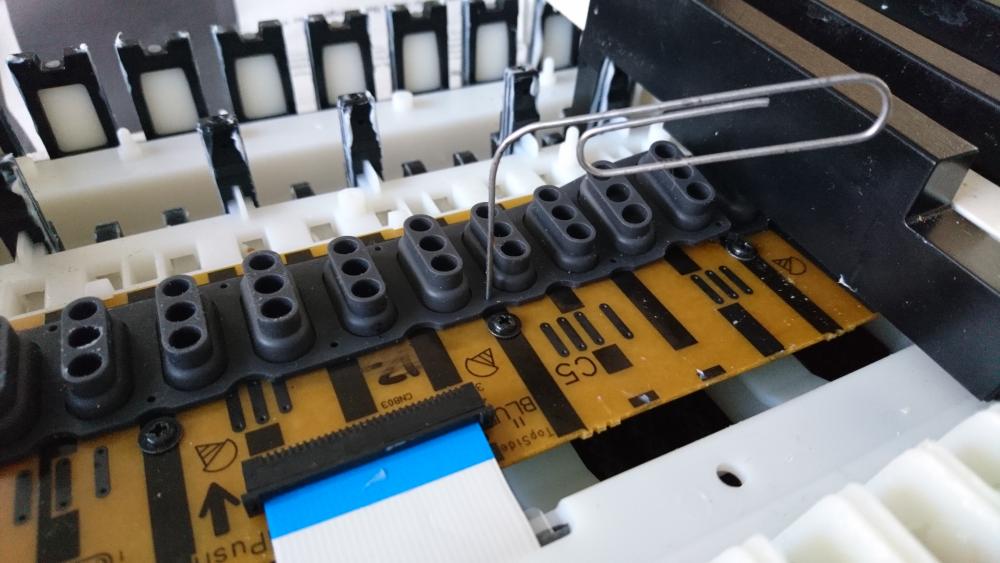
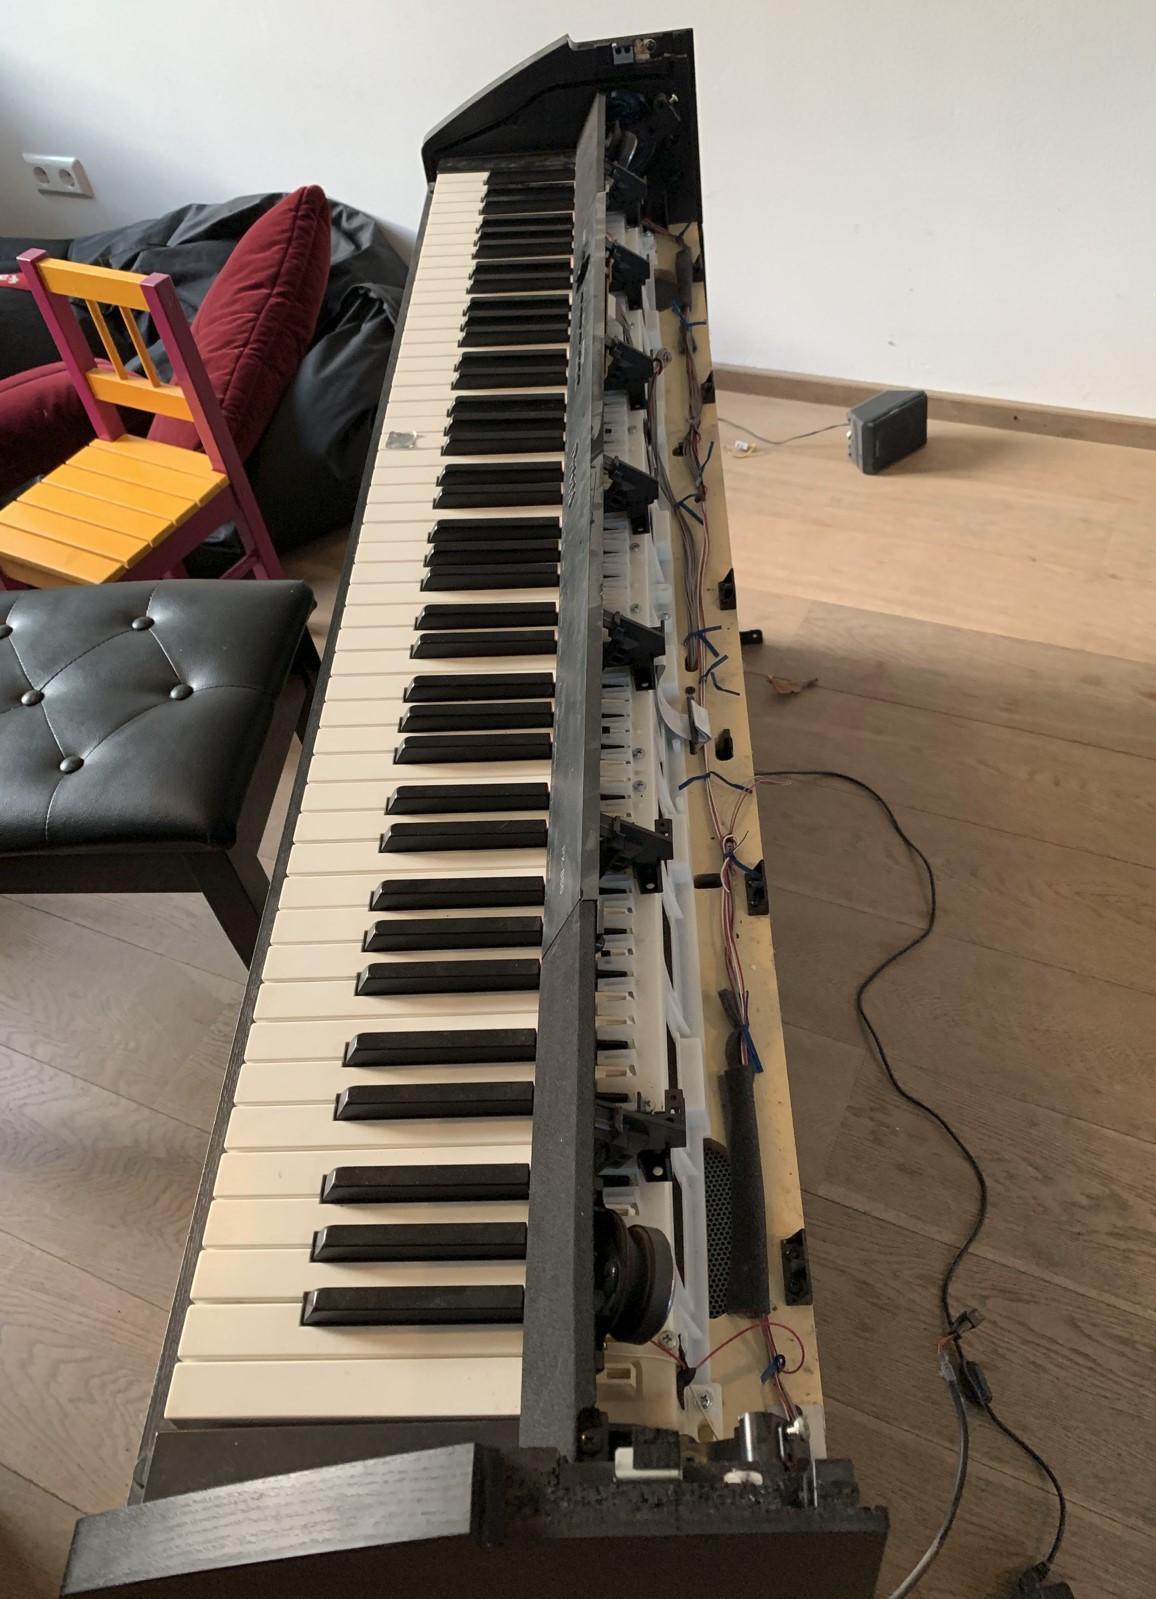
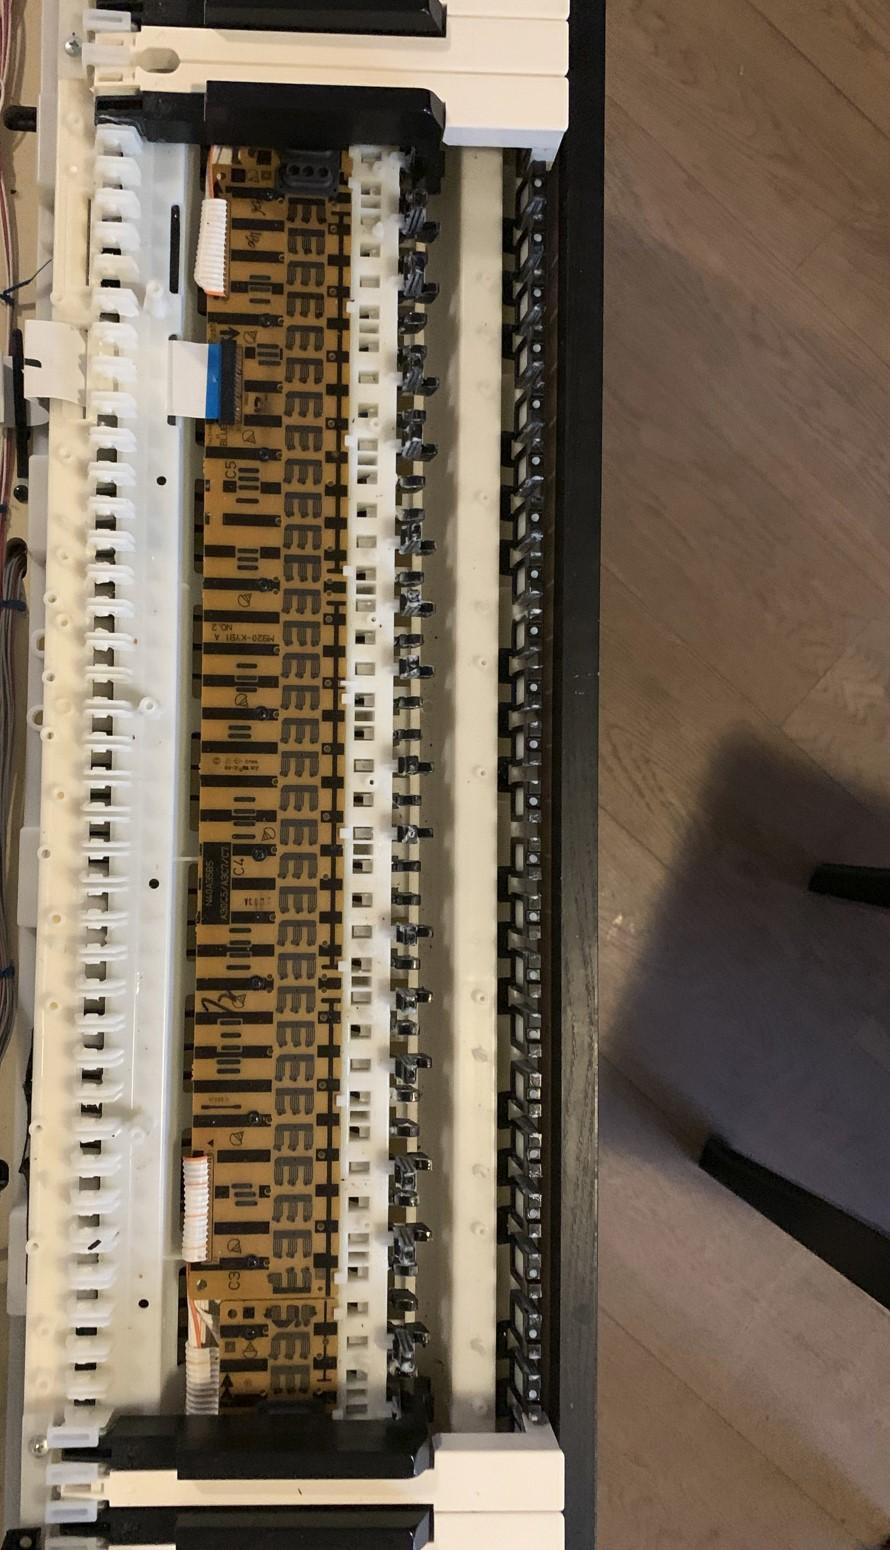
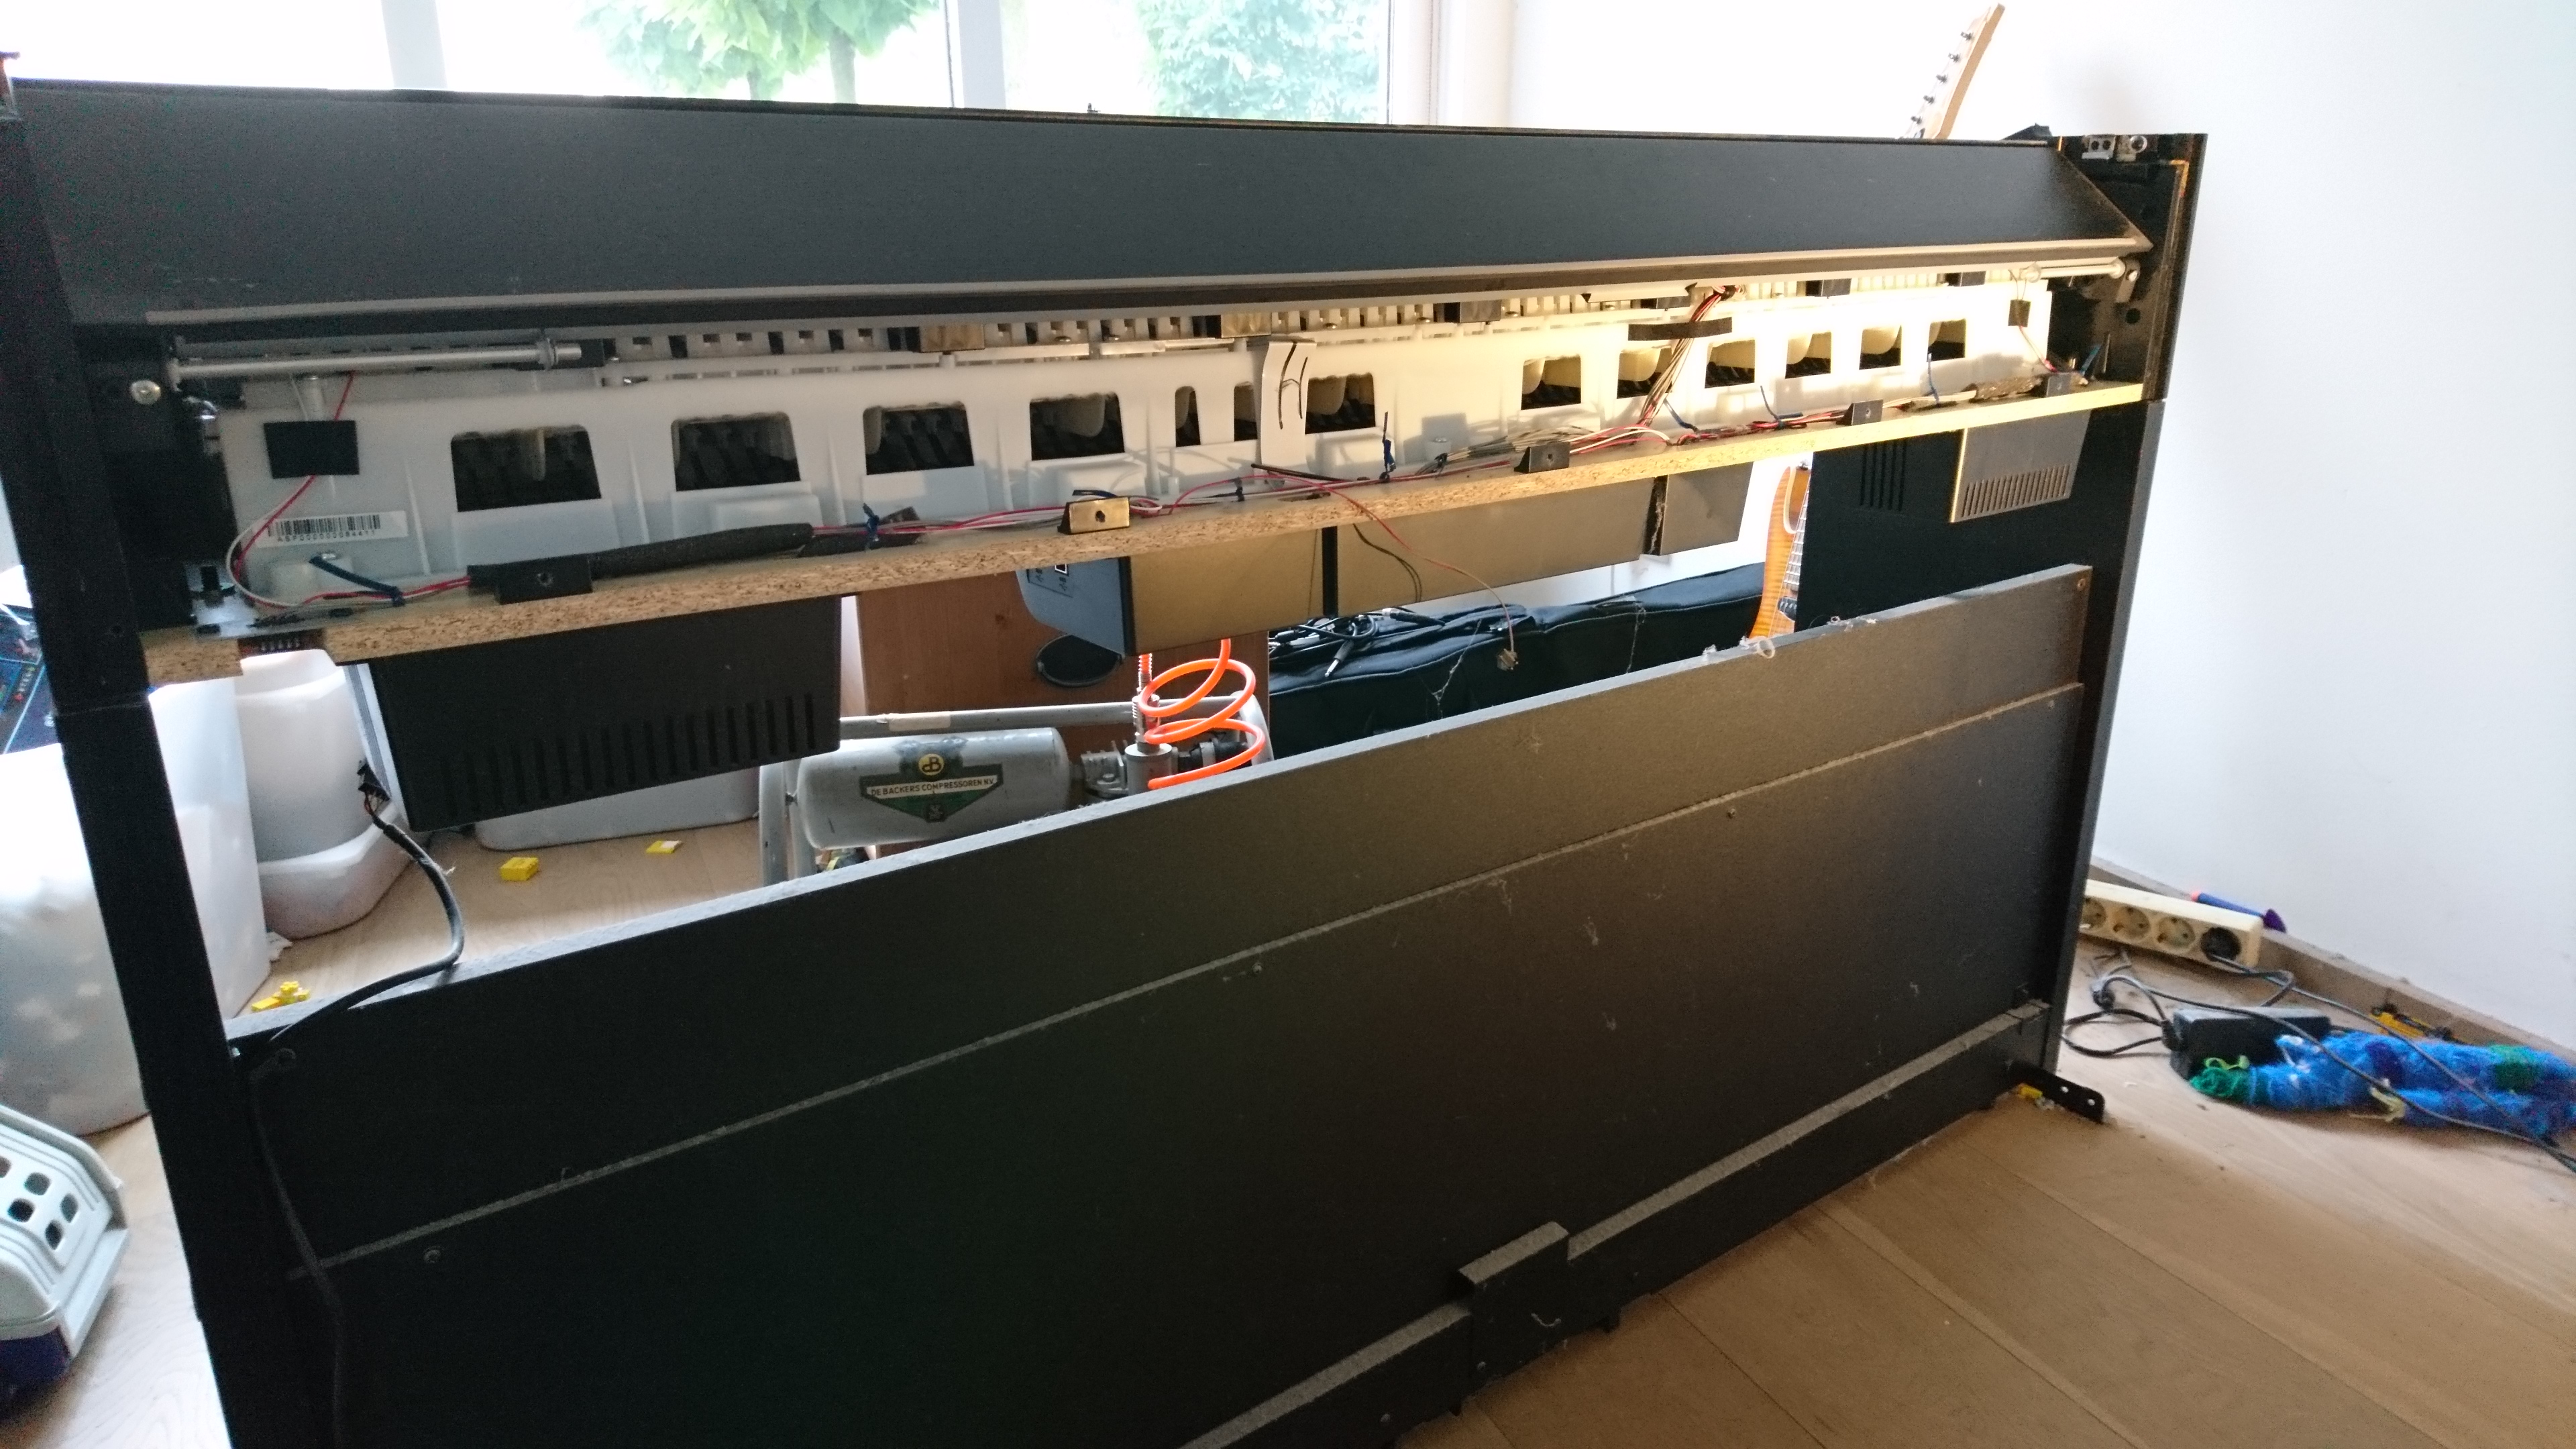
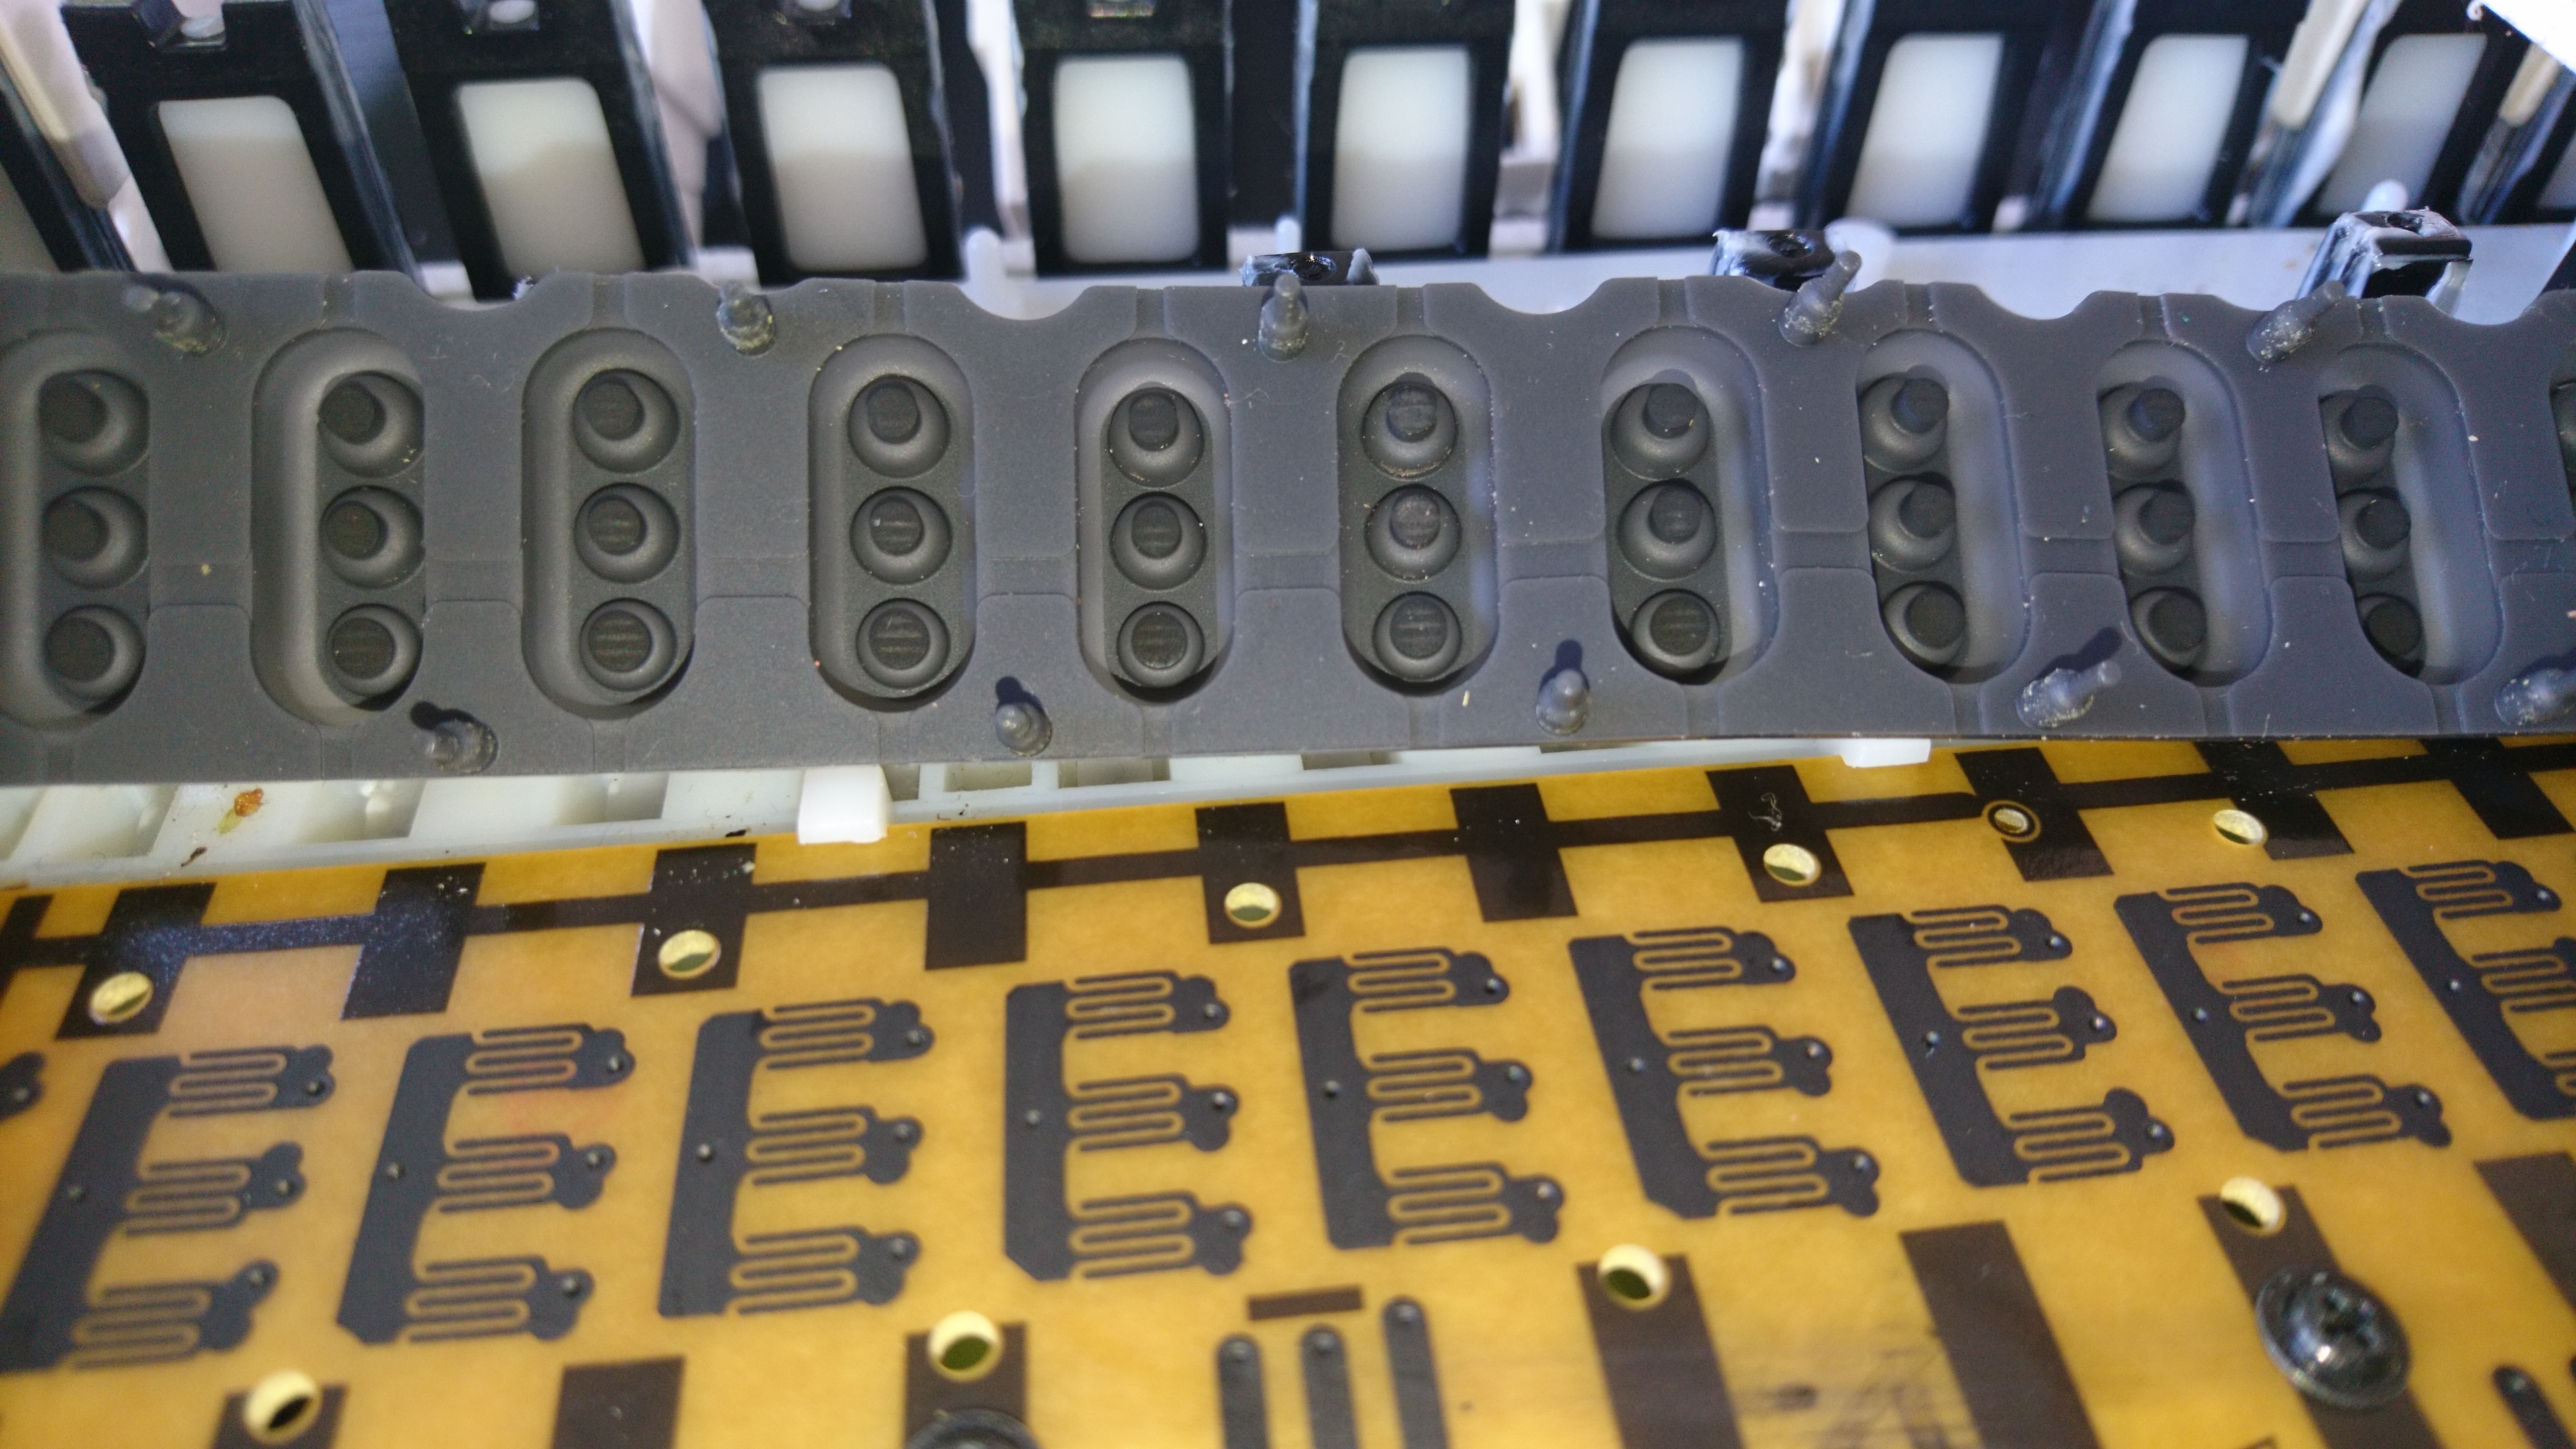
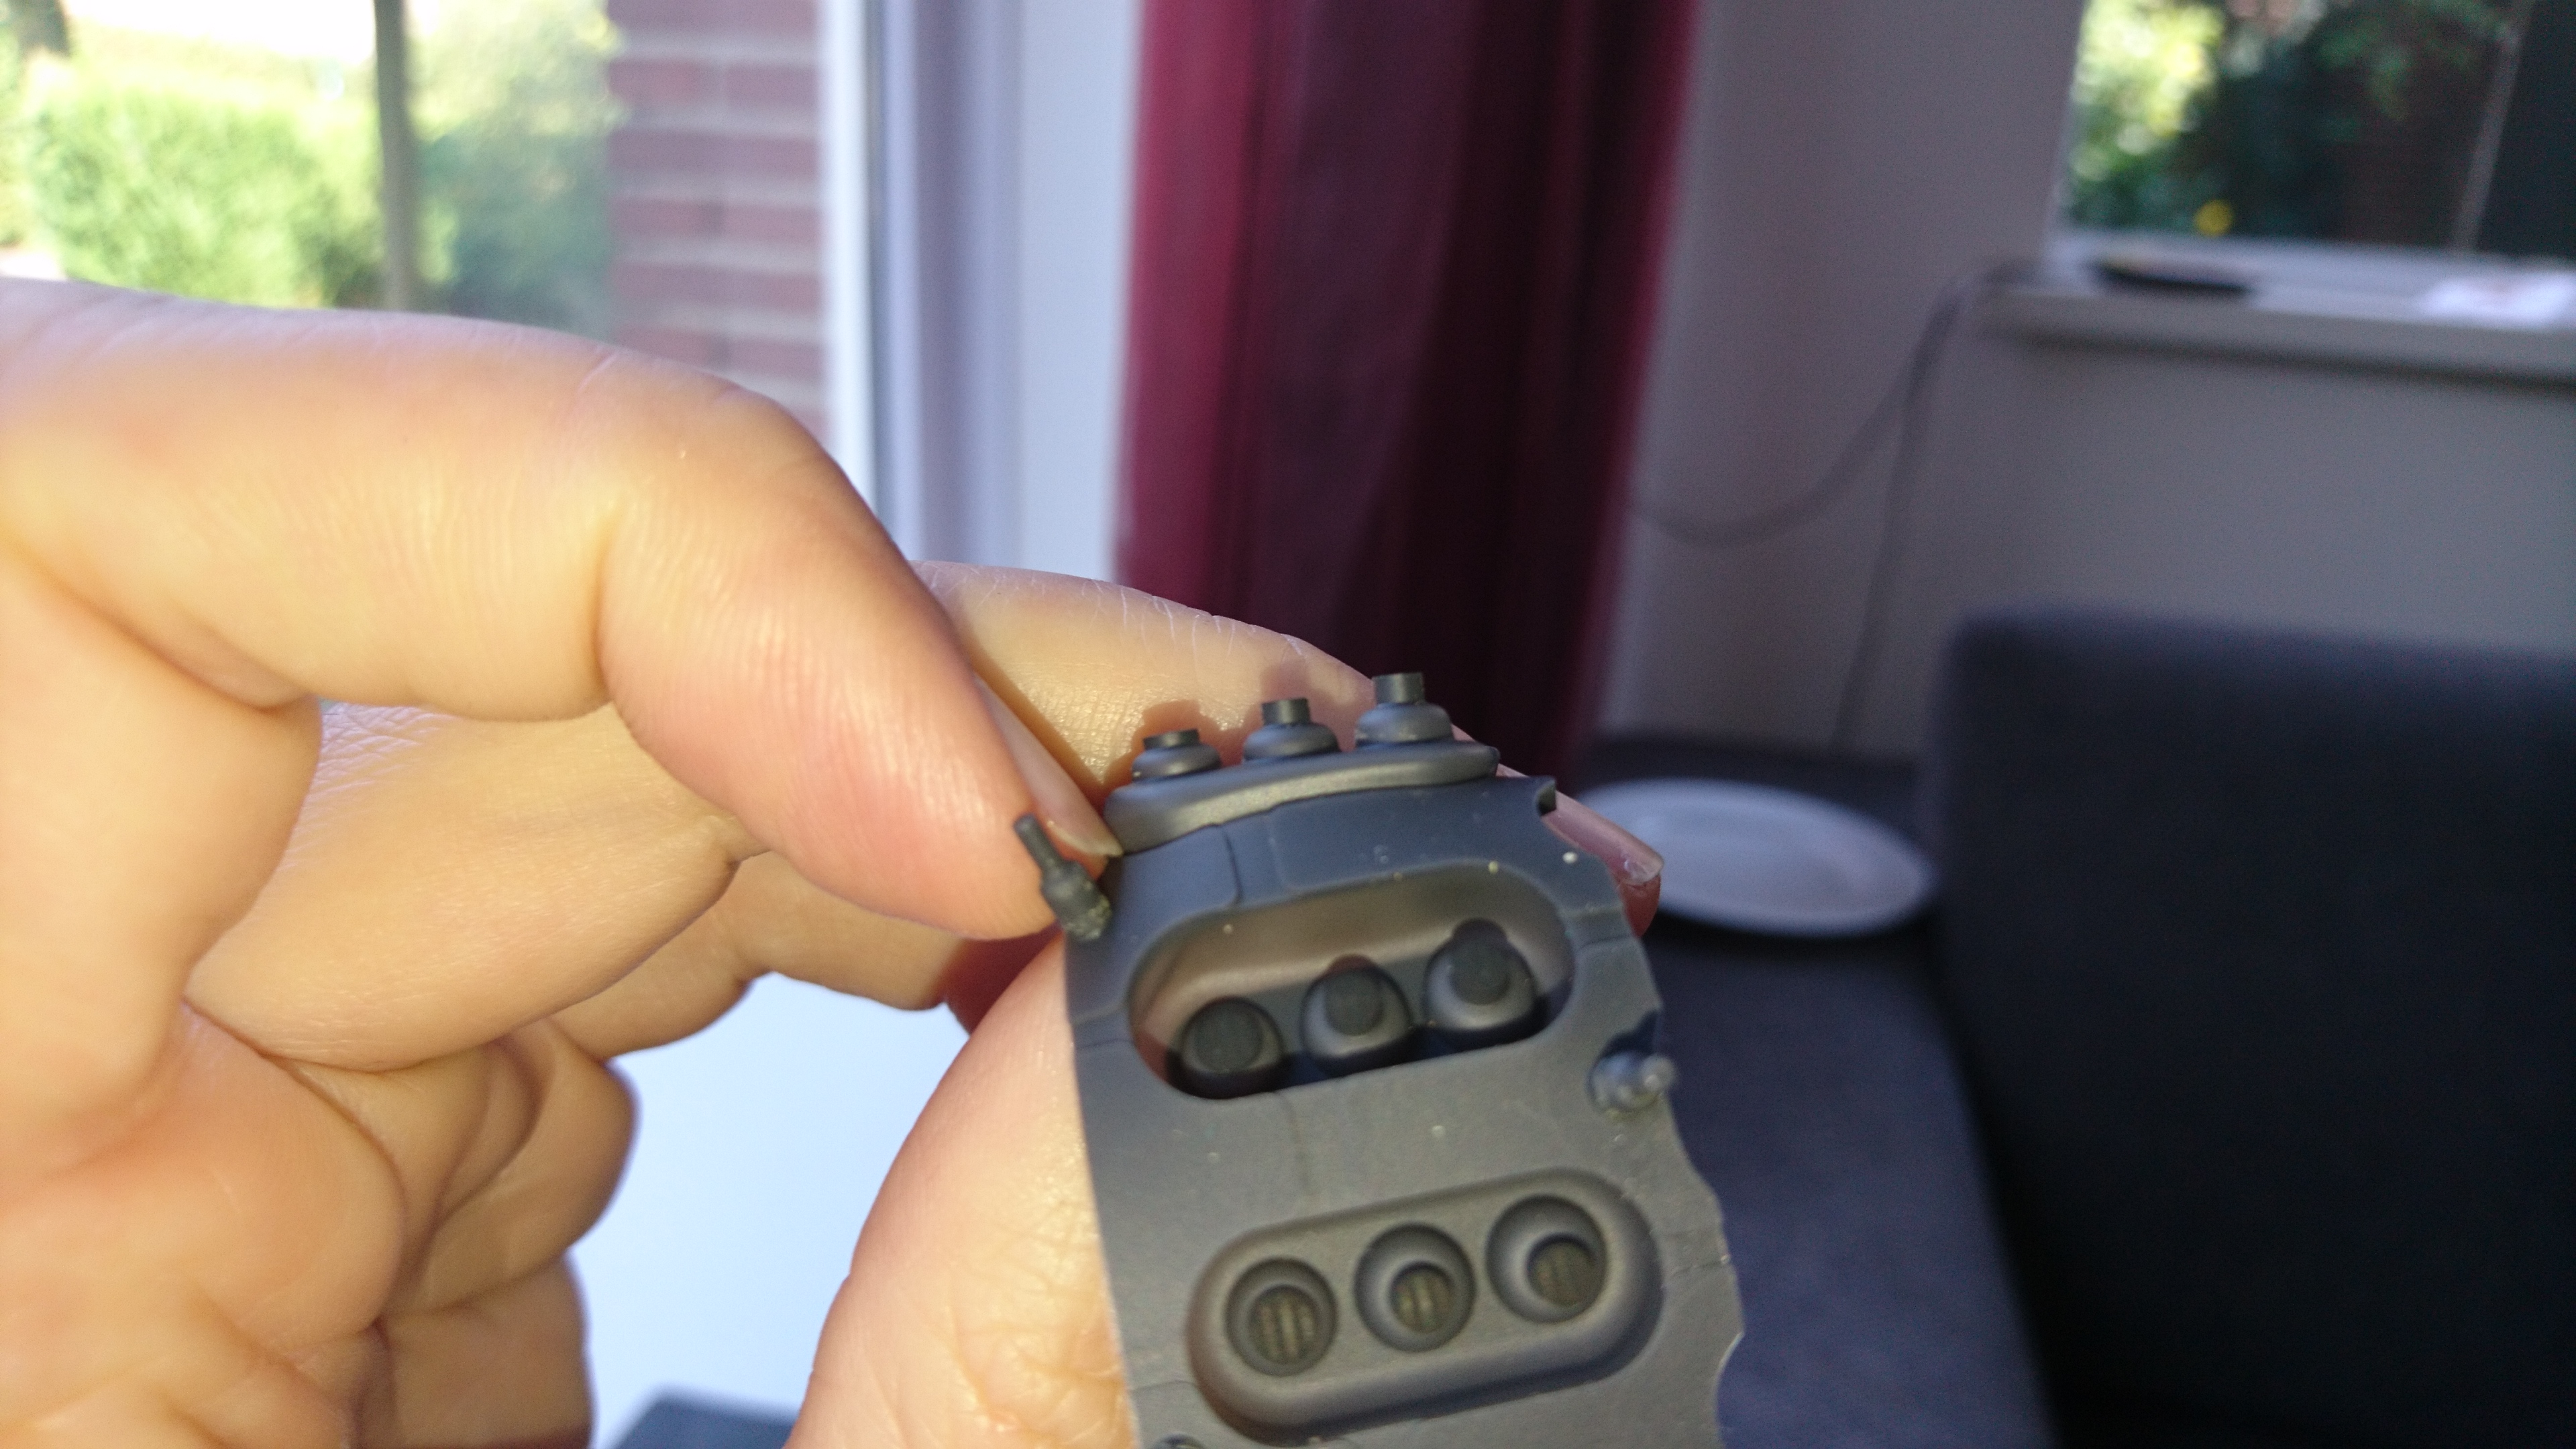
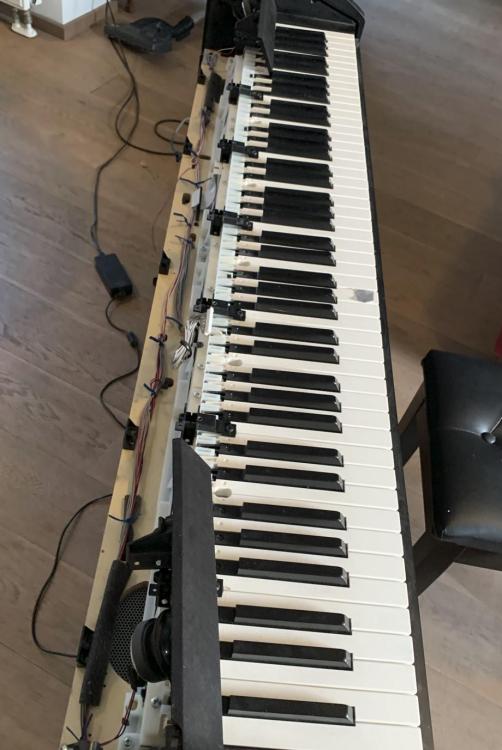
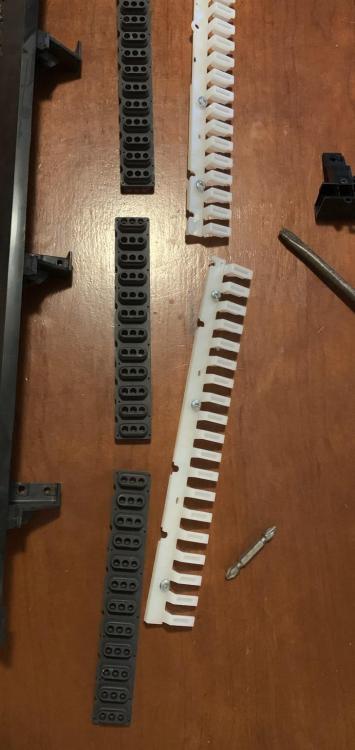
Hi, My Privia PX-850 developed a loud key (i.e. full volume regardless of the key actuation force). I suspected an issue in the sensor of the key, and opened up the piano to try and repair the issue. I could not find nice information online on disassembly of this piano, so I'd like to share some pictures with you here, perhaps it will be of use to someone. I started by removing the backpanel. That was easy, but be aware of the cable connecting the lid sensor. There is a connector that allows disconnection. Next I removed the keyboard cover. A screw holds the metal bar in place on the spring mechanism. Loosen the screw and slide out the bar. Next, the whole cover can be slid out of the rails. Next, I removed the whole keyboard assembly out of the cabinet. In retrospect than may not be necessary to remove the pianokeys and access the sensors, but this is how I did it. I loosened the center electronics cabinet and loosened all connectors. The high density flat cable can be unlocked by lifting up the plastic top ridge in the pcb connector. The right speaker casing also needed to be removed as it covers some screws. I removed the front panel with the controls. It is attached to the keyboard assembly through several posts, unscrew these from the front panel. Also, At 1/3 of the length next to the grille two screws keep together two segments. After detaching, both halves easily come out. I removed the tape and ziptie connecing the cables to the white keyboard assembly. The keyboard came loose with 3 screws on top and a whole bunch on the bottom. After this, the whole assemble could be maneuvered out of the back with relative easy. Take care to support it well over the length. Next, I loosened the retaining bracket behind the affected keys. Also, the black posts for the front panel had to be removed in that segment. After removal, I could take out first the white keys, then the black. The keys hinge between white plastic tabs, after prying and spreading them a bit the key can pop up, and move back and out. I removed keys until a whole sensor segment was exposed.. I loosened the rubber strip from the membrane switch array gently. It is stuck in with soft rubber pins in holes on the pcb. Each key had 3 contracts (tri sensor!) at different heights, I suspect the connect sequentially and stroke force is deduced from the timing between them. Finally, what I came to do. I gently cleaned both the carbonized rubber contacts and the zigzag pcb segments with isopropyl alcohol and a sort of cotton tip applicator. Then reassembly. The rubber segment was hard to get seated in the holes, until I found that a paper clip wire can poke in the holes on the top and nicely push in the 'legs' below in their holes. Next the keys went back in, secured by the brackets, everything back in the cabinet, and try to remember where all screws came from. In the end, I powered up the instrument, and yay! the piano key is now touch sensitive again. Mission accomplished. Over here I made a movie of the action being actuated.