

pchevalier
-
Posts
7 -
Joined
-
Last visited
Recent Profile Visitors
863 profile views

pchevalier's Achievements
")


-
PX-350 keyboard mod, success at last!
pchevalier replied to Jokeyman123's topic in Privia x50 x60 Series
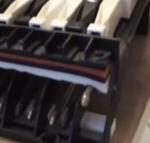
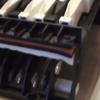
I am on the process to restaure my noisy Privia keyboard. A first session has improved a good deal of noise using a foam self adhesive strip. I am testing the result through playing my favourites musics. I will then reopen the keyboard to observe and adjust. At this stage I see 4 topics : A - Screw. Be methodical when unscrewing : (note where are the screws difficult to see to avoid to have 2 or 3 left at the end), Be careful when screwing to avoid to damage the plastic. Use an adhesive to fix each screw on the screwdriver for the screws that take place in the holes under the traps. B - Dissassembly carefully the plastic (4 hands needed) ; carefully disconnect the electronic connector strip. Place the parts on a sheet. The keybooard has to be returned turvy and placed on the "surgical table" 2 thick books (1 or 2 inches) are placed underneath at each end so that the keys (mainly the black ones) are not pressed and that you can access freely to the 2 strips : C The strips We have to concentrate on this third topic : what strip shall we choose, shall we add because the used strip are thiner where the hammer strike) or replace ? The 2 strips need to be considered : 1/ key return strip - the upper one on the surgical table - (as the keyboard is upside down. It it is the bottom strip in playing position, that dampens when the keys are released or that dampens the return of keys ). 2/ the keystroke strip - The bottom one on the surgical table (when the keyboard is in playing position it is the upper strip where the hammer strikes) I would condider 3 options : * the strip is not degraded (about 1 year - it is the option I had to face to) : It is sufficent and effective to add a self adhesive foam strip : 6 mm thick for the 1 (return strip) and eventually 3 mm of foam thick for the 2 (keystroke strip) 6 mm would be too much. It may not be necessary to modify anything here. Good new : Auto adhesive foam strip (found in any brico store for 2 or 3 $ for 6 meters) sticks properly, it is easy to place it correctly for the 1/ and to remove the protective tape by attaching a sewing thread on tit and pulling steadily. For the 2 you have to turn first upside down the keyboard to introduce the strip (the hammer will move down) with its the sewing thread attached. ** the strip has very marked hollows. For the 1 a 3 mm neopren strip instead of the 3 mm foam and for the 2 a combinaison of 3 mm neopren and 3 or 6 mm foam *** If the strip is degraded : it is not yet the case for my keyboard, then it maybe better to replace the 1 and the 2/ with a mixt of 10 mm neopren + 6 mm (2 or 4 $) foam or whith the Yamaha Clavinova ref V8484201 (30 $ each) . 4/ The interface between the key and the hammer. The end of the key (inside) is open so it can fit around the end of the hammer arm, which is coated in rubber. As this interface wears, slop develops between the key and the hammer. You clearly see the 1 or 2 mm beat when you take the end part of the key between 2 fingers. This needs to be explored. I will do it next time. I would like to post some pictures if someone explains how to post files on my media library. Some time ago, the french Casio distributor (NIKKEN TECHNO FRANCE) accepted to repair my first Privia Keyboard (PM350) on basis of the demonstrative video I sent to them. It took them 2 months to change the complete mechanical part whereas they could have changed only the strips in one day. After 6 months, the Privia PX 5S I bought to replace the PM 350 is suffering from the same disease. I am sure that Casio will at the end decide to propose a set of quality strips comparable to the Yamaha Clavinova or a service "upgrading your keyboard". -
PX-350 keyboard mod, success at last!
pchevalier replied to Jokeyman123's topic in Privia x50 x60 Series
Here are 3 interesting pages 1/ How to disassemble (Privia 555). it not accurate enough but can complete the procedure explained here by Jokeyman123 https://pressstartsounddesign.wordpress.com/2013/04/28/demonter-ouvrir-un-piano-casio-modele-de-lexemple-privia-px-555r/ 2/ https://www.flickr.com/photos/timsphotographs/sets/72157632641890363/with/8427512829/ 16 Interesting photos of the casio keyboard (PX 330) dismantled. It is easy to see the 3 strips and to see what strip to use to replace them (the strip on the bottom at the backside can be replaced by V8468201 yamaha whereas the strip at the bottom on the front side should be replaced by a weather strip (around 1/4inch wide and thick) 3/ A good synthesis of the "noisy keyboard issue" presented in the forum following the photos in four "key" elements . The 1 is to be considered. https://www.flickr.com/photos/timsphotographs/4880268252/in/set-72157624572728251 "There are a few things that cause the keys to make noise in these units: 1) The interface between the key and the hammer. The end of the key (inside) is open so it can fit around the end of the hammer arm, which is coated in rubber. As this interface wears, slop develops between the key and the hammer. This is more of a 'click' and you hear as soon as your fingers touch the keys (or come off the keys). I have not started working on a solution yet, but possibly coating the rubber ends of the hammer in something (heat shrink, RTV, etc). 2) The 'clunk' that the hammers make when returning to the resting position. The hammers fall onto a rubber/felt pad that is on the bottom of piano case. The bottom case is thin plastic. If you put your hand under the hammer that is playing you can feel it fall and feel the case move. Other brands use either MDF or metal for the bottom of the case. I am thinking of either spraying the exterior bottom case in sound damping material, using adhesive backed Dynamat, or building a custom stand that has sort of a box that surrounds the bottom of the keyboard, and the box filled with insulation. 3) Similarly, when a key is pressed you can hear the hammer hit the upper felt. As the rubber and felt wears these 'clunks' will get louder. It is possible to replace the felt, and it is easily accessed by only removing the bottom part of the case. 4) The interface of the hammer and the case. Unfortunately there isn't much you can do with this one, but if any slop exists between the metal hammer and the plastic case, it will make noise. I haven't thought too hard about this one as there isn't a ton of room to work with, it is a moving interface, and if the case breaks you are SOL. Luckily this would be the least likely scenario to cause that much of an annoyance. For the money these keyboards are great. You have to spend well over a thousand dollars to find something better." -
PX-350 keyboard mod, success at last!
pchevalier replied to Jokeyman123's topic in Privia x50 x60 Series
Thanks Aymeric 106 These weather strips are available in many shops in varied sizes and texture : rubber (may be too much bouncy, foam (may be fragile), felt, or, a basis of foam covered with felt (Clavinova strips look like that). It is very cheap and easy to buy when you have dissassembled the keyboard and can see the dimensions. Finally, if it is easy to remove the existing strip it is possible to buy the appropriate strip and fix it. As Jokeyman kept the strip in place and completed with a supplementary one We lack information on the remove process. On the old Clavinova it looks easy. But on our new Privia I don't know. Could you post the adress of the video you are refering to ? Regards Patrick -
PX-350 keyboard mod, success at last!
pchevalier replied to Jokeyman123's topic in Privia x50 x60 Series
Thanks Jokeyman123, The work needs 4 hands indeed. OK, the option "replace the felt" is not obvious. As the strips are well glued it could be difficult to clean (on the video it looked difficult for the bottom strip). Adding an extra felt is to be considered if I can find a good tape. Before buying (50 $) the two strips I have to be sure they fit. Anyway, as concerns the references, the felt 1 (the one on the top side) on the Clavinova video is the ref. V764010R strip on the Beckett site. But il will not fit on the Privia as the sticky part is beside the felt. The ref. V8468201 Aymeric mentioned looks better suited for the Privia. For the strip on the bottom side which was used on the video corresponds to the ref VU 34210R of the Beckett site. I guess it would be OK either for the upper strip or for the bottom strip of the PRIVIA. So I would order it soon. Patrick -
PX-350 keyboard mod, success at last!
pchevalier replied to Jokeyman123's topic in Privia x50 x60 Series
Thanks for this explaination : 3/8 Inch (= 1cm for me in France). I will try to find how thick are the 2 Clavinova strips. I have watched this interesting video which shows how to replace the 2 strips on a clavinova. It is very clear and the operation looks quite affordable to do. The counterweights of the fulcrum arm of the Clavinova Yamaha are round and polished whereas those of th Privia are sharp. This can explain that after several month you have such a noisy keys versus several years for the Clavinova. I would have liked to add 4 images to my post to show the location of this two strips, but I was not able to find how to upload images in this forum. So I have used my photo to figure the bottom and the upper felt of the Clavinova. The profile of both strips can be seen on the video and on the Beckettsmusic website : http://www.beckettsmusic.co.uk/shop/scripts/prodView.asp?idProduct=17270 I hope these strips will suit for ou Privia keyboard. I also guess that the location of the 2 strips on the Privia is about the same as on the Clavinova. If it is the case, it would be easy to remove and to replace them. In that case I would try it very soon. Regards Patrick -
PX-350 keyboard mod, success at last!
pchevalier replied to Jokeyman123's topic in Privia x50 x60 Series
Many thanks Jokeyman123 for your work and the reflexion which highlights it I am in France. I have played on a Privia PX 350 and now playing a PX 5S. After 6 months, the keyboards produces the same clunking noise (for me the "up stroke - bounce noise" is the most "distracting"). I fear I will not be able to wait 2 years until the warranty ends I will look for : - doubble sidded tape (thank to cpCohen - An auto-body supply shop will sell you "body molding tape", which is what they use to hold side-moldings onto car doors. It's very tacky, especially if you prep the surfaces with acetone (or special "activation liquids" they'll sell you) - very dense gray felt material actually used for weatherstripping or Yamaha new felt/foam strips - thank to Reflexion - "which were not at all expensive. This reduced the noise to "brand new" levels (-not noiseless, mind you, but acceptably quiet-) -at least until the felt packs down again!" One think need some explaination " How rhick should the felt be ?" Regards, Patrick -
I have been playing on a PX 5S Privia for 6 months and have noticed that the loosened keys make a rattling noise when going up. I had the same experience with a Privia PX 350. CASIO had accepted to change it. I was hopping that the PX 5 S would have been more discret but it is not the case. So I am happy to find this post. Thanks Bouncy Nugget and Jokeyman123. Jokeyman 123, your thread on PX 350 seems to bring an issue. I realize that i will have to follow your example . ... At my own risk ?!
