SYOTR
-
Posts
12 -
Joined
-
Last visited
SYOTR's Achievements
")


-
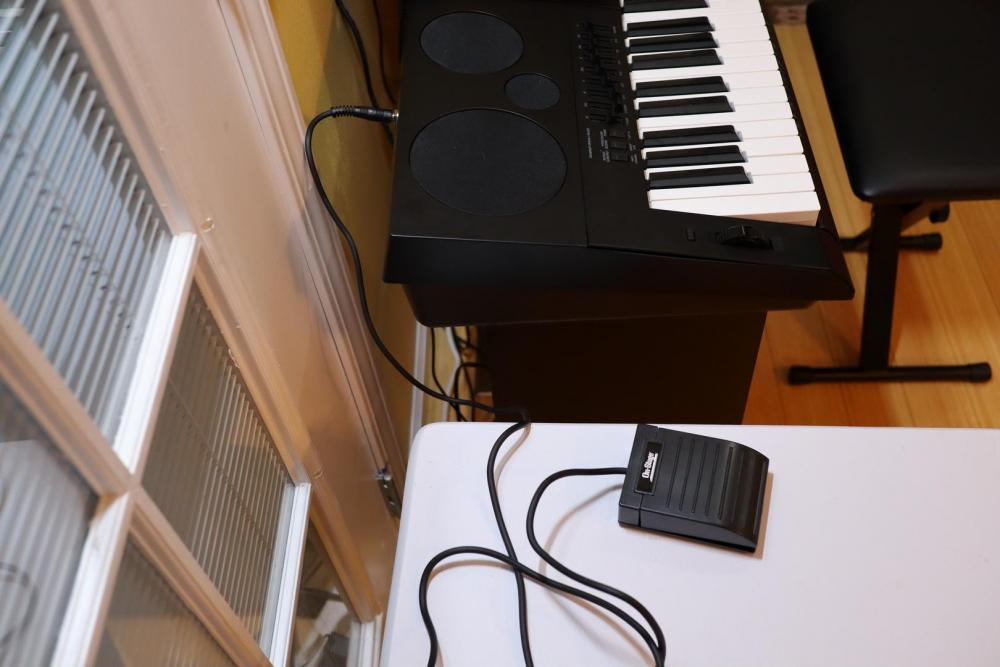
The original pushbutton is momentary contact, push once for fast speed, push again for slow. The foot pedal I used is also momentary contact and simply wired in parallel across the original switch terminals and behaves the same way. While you could mount a switch to the front of the keyboard, the Leslie switch would not work as it was a single pole double throw switch.
-
Here is my external rotary switch mod. If you are handy with a soldering iron and don't mind opening up the keyboard, you could do this in an hour or so. My cost was $27 including the pedal.
-
There are several aftermarket pedals that have a switch to change polarity. I added an external switch to change rotary speed but it only works with drawbar organ. Best you can do is create custom copies of voices and save them with rotary speaker on and off and switch between the two registrations. You might try creating this piano sound:
-
Yes, these are the same points that the pushbutton connects to. Yes it is a momentary contact pedal.
-
foot switch for rotary speed control
SYOTR replied to Cincinnati Joe's topic in WK-7500/7600 - CTK-7000/7200
-
Got it working. I placed it between the Yamaha mixer and the amplifier. It seems to work as expected. This will be fun to learn.
-
The looper pedal is a Boss RC-3 Loop station. I plan to use it to do live looping and overdubbing. I am currently connecting from headphone output to a Boss Fv-500L volume pedal to a Yamaha MG06 mixer to my home theater system.
-
Anyone using a looper pedal on these Casio models? I found a nice one for cheap. Not sure which output to connect it to, headphones or line out.
-
Looking at the XW-P1, it appears to have the same group of three switches as on mine. I would not be surprised to find the same circuit board underneath.
-
Those look pretty cool but pricey. My solution cost $27 including the foot switch.
-
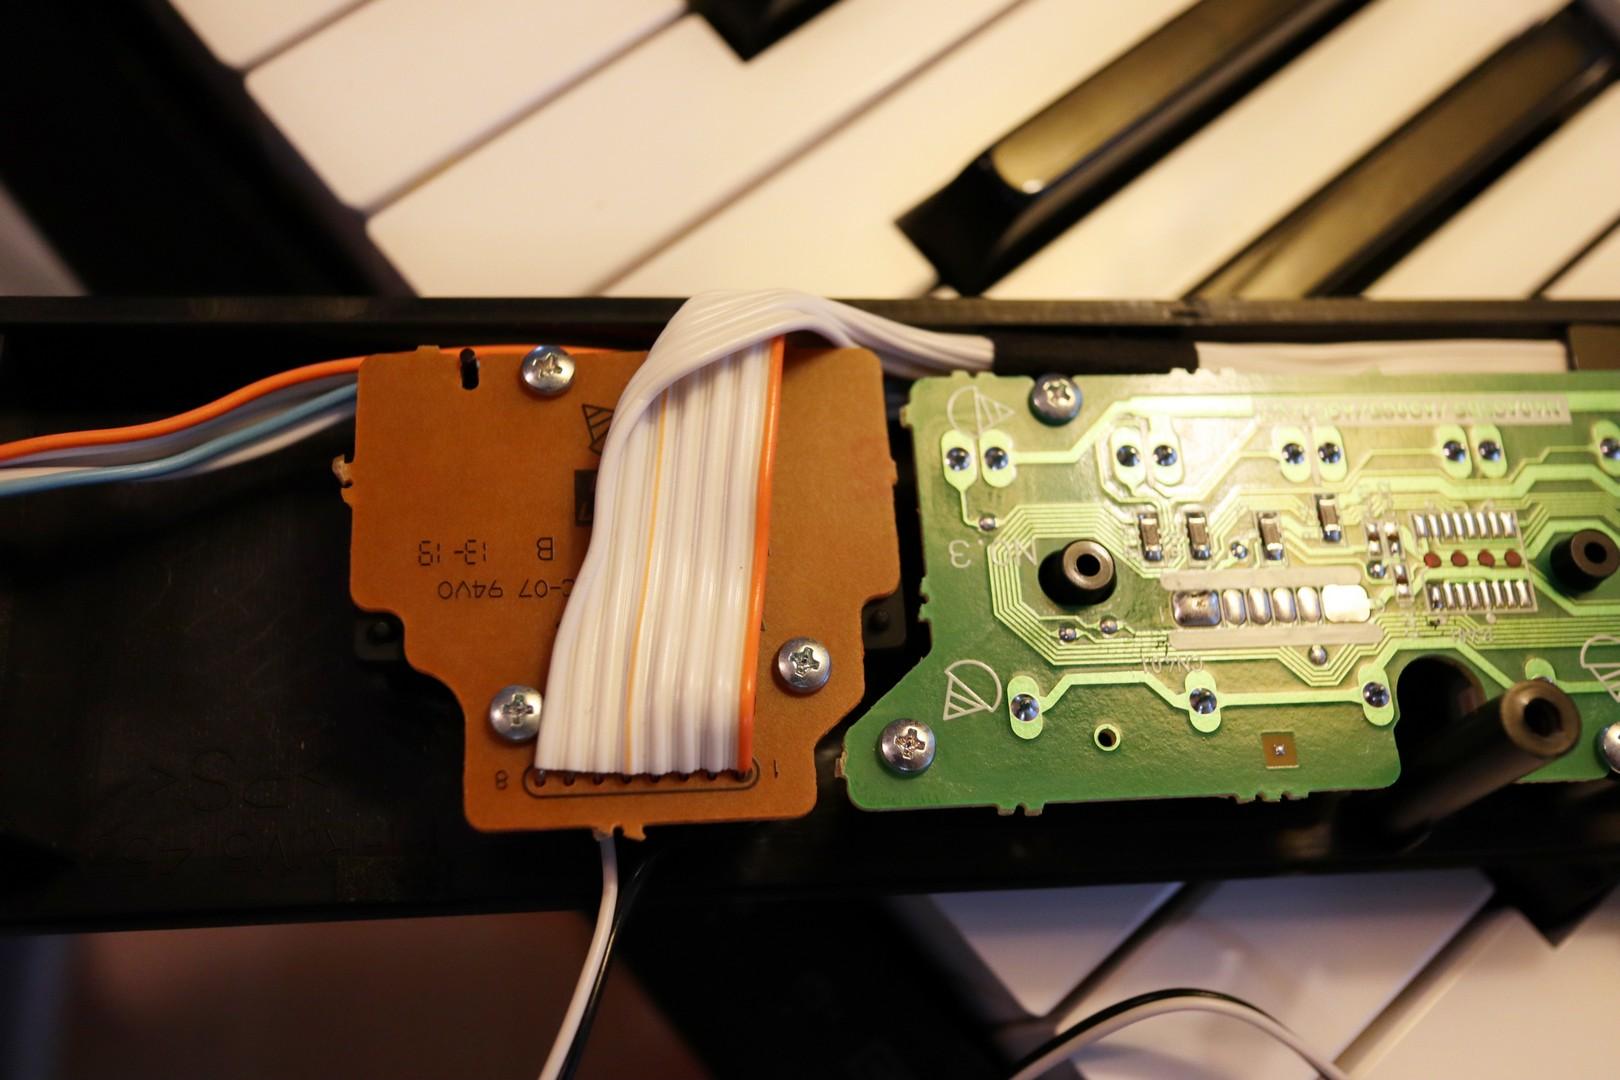
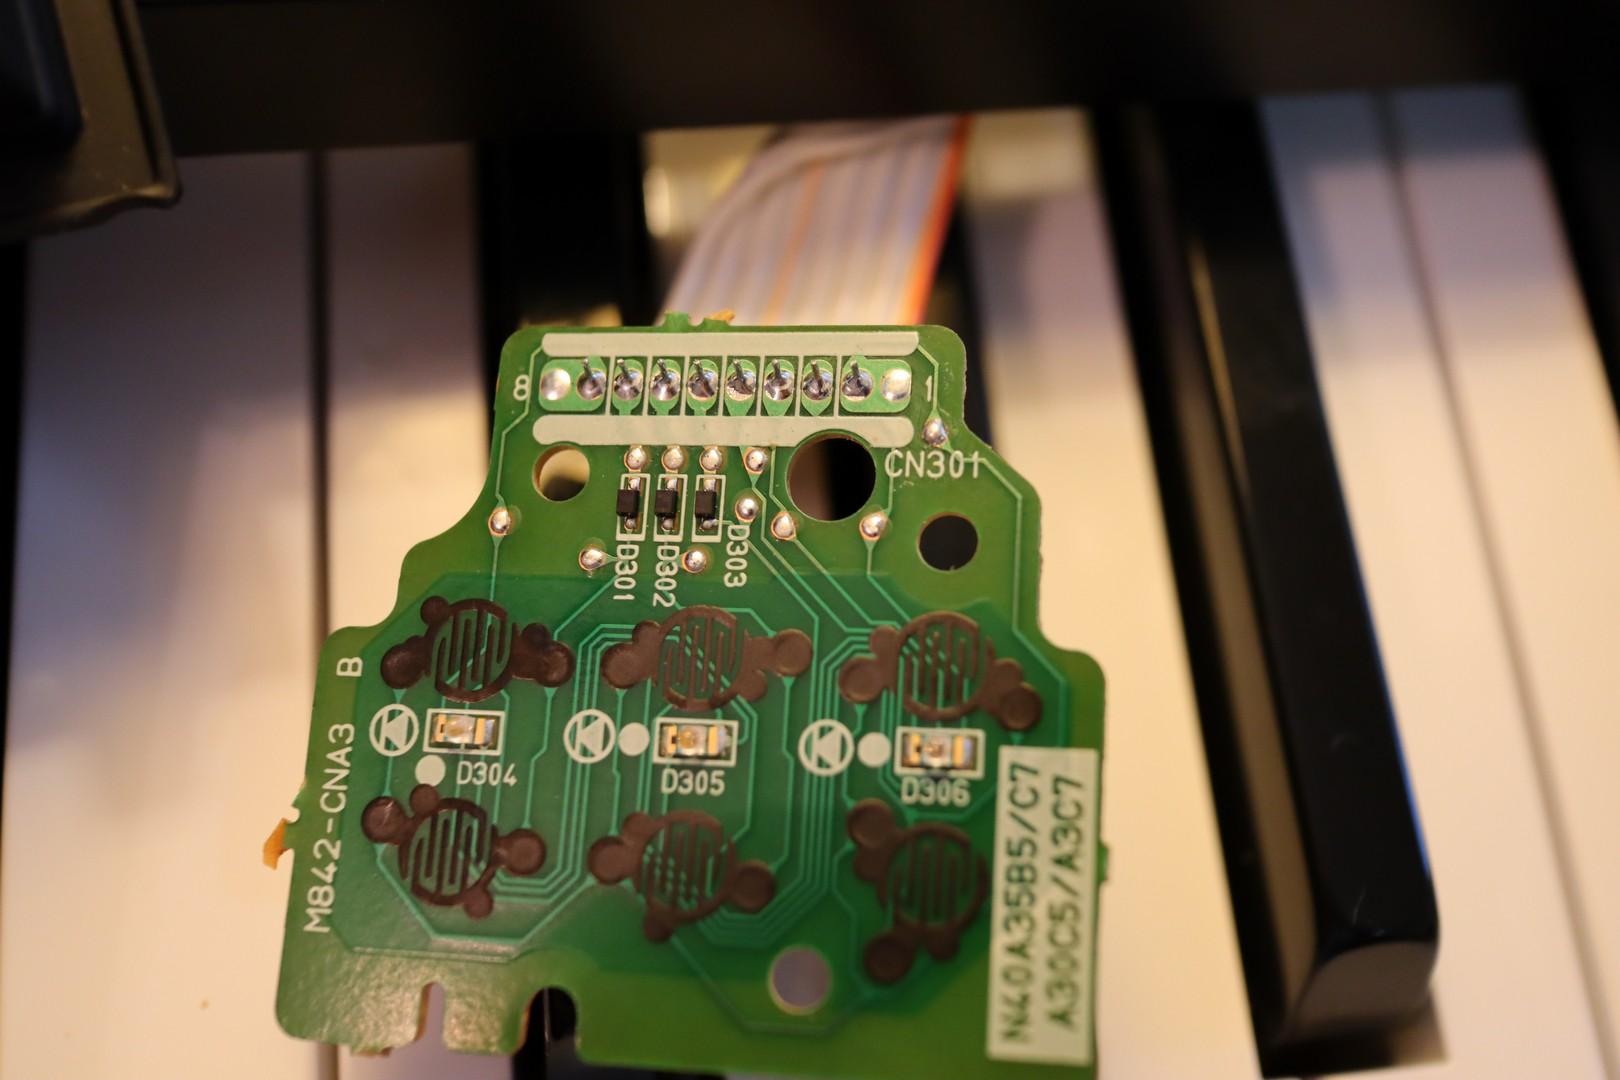
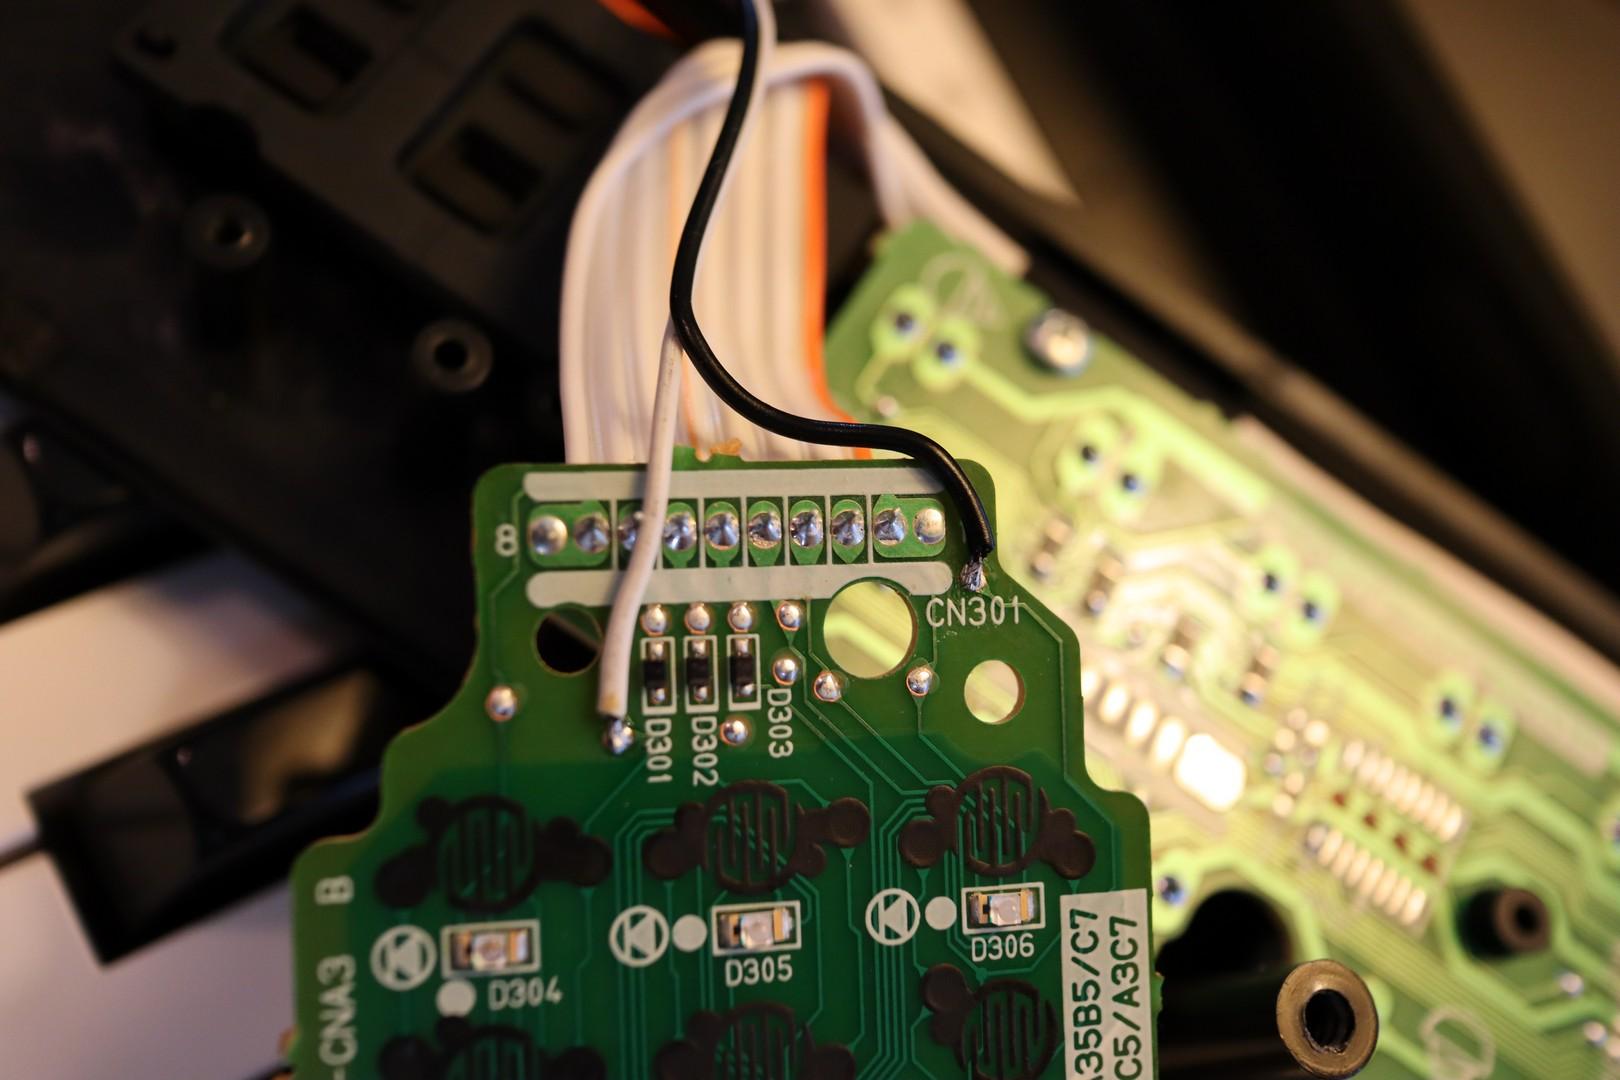
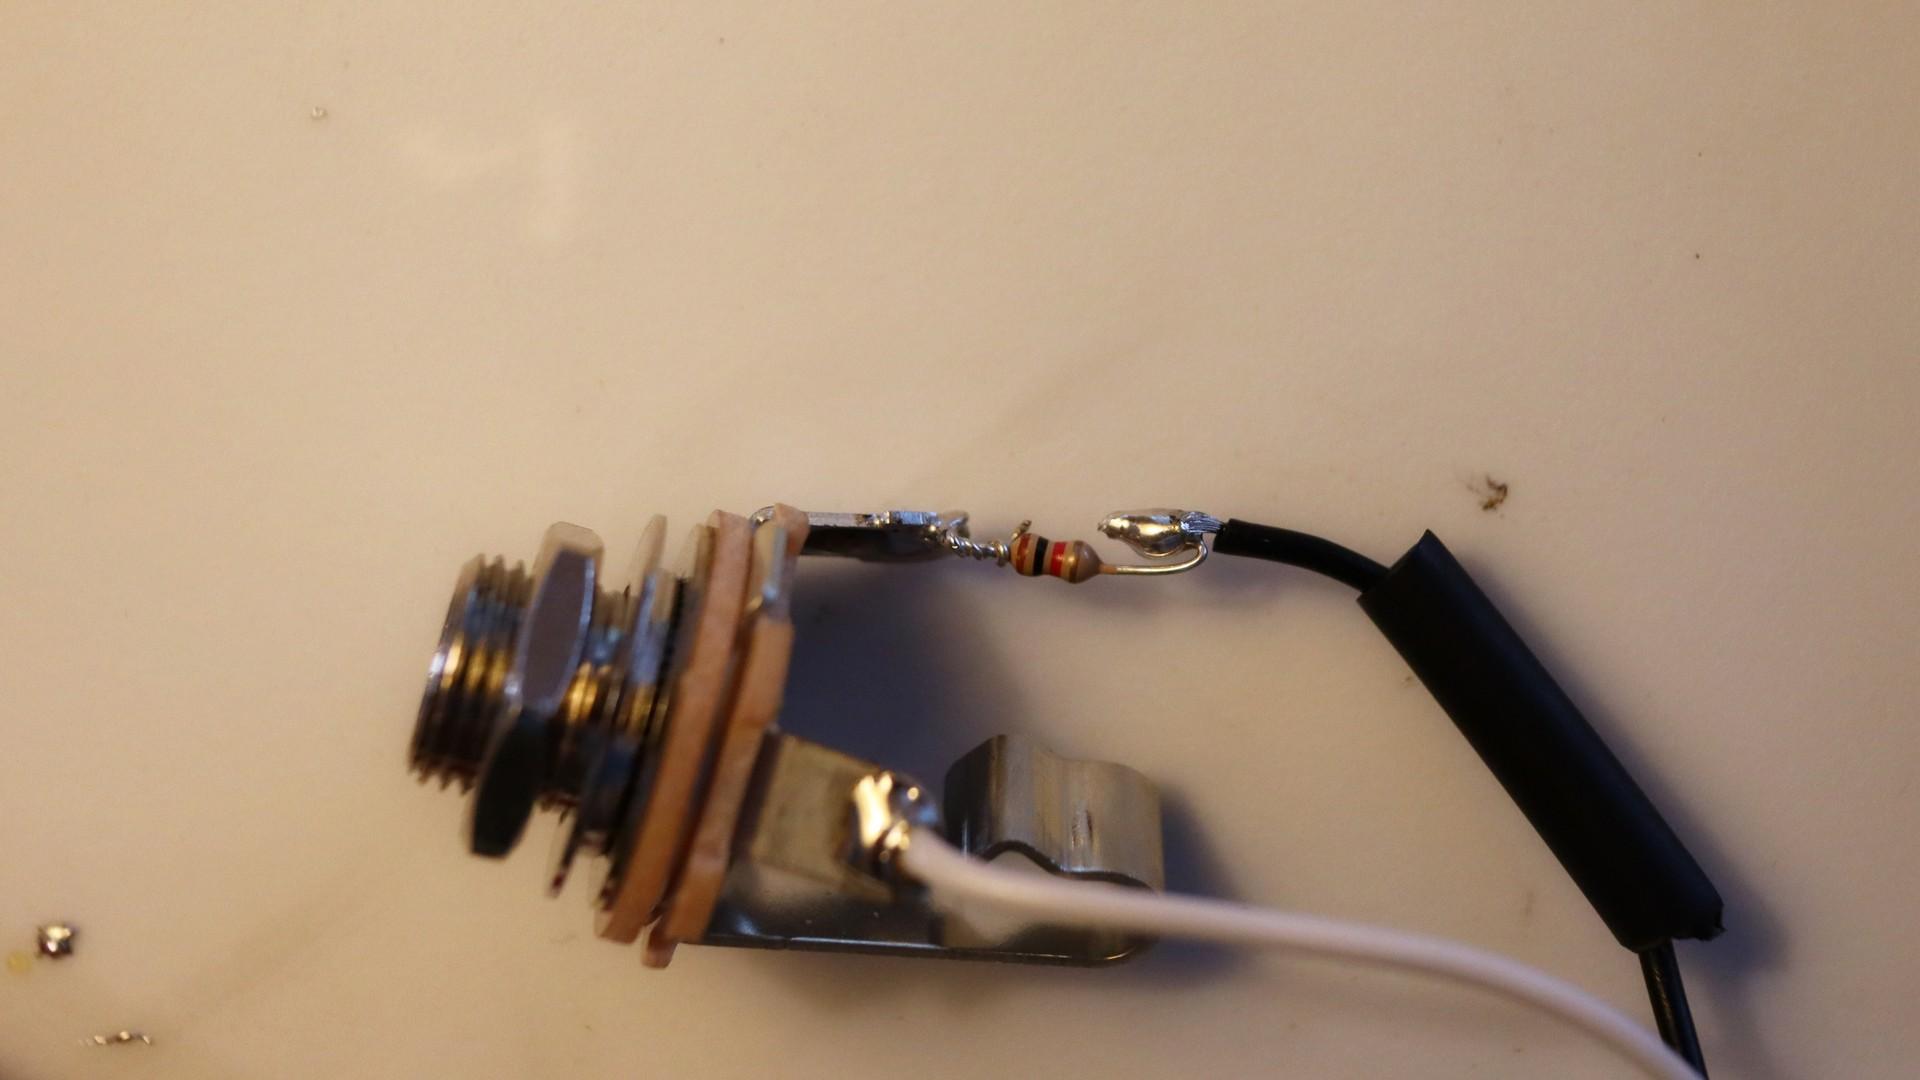
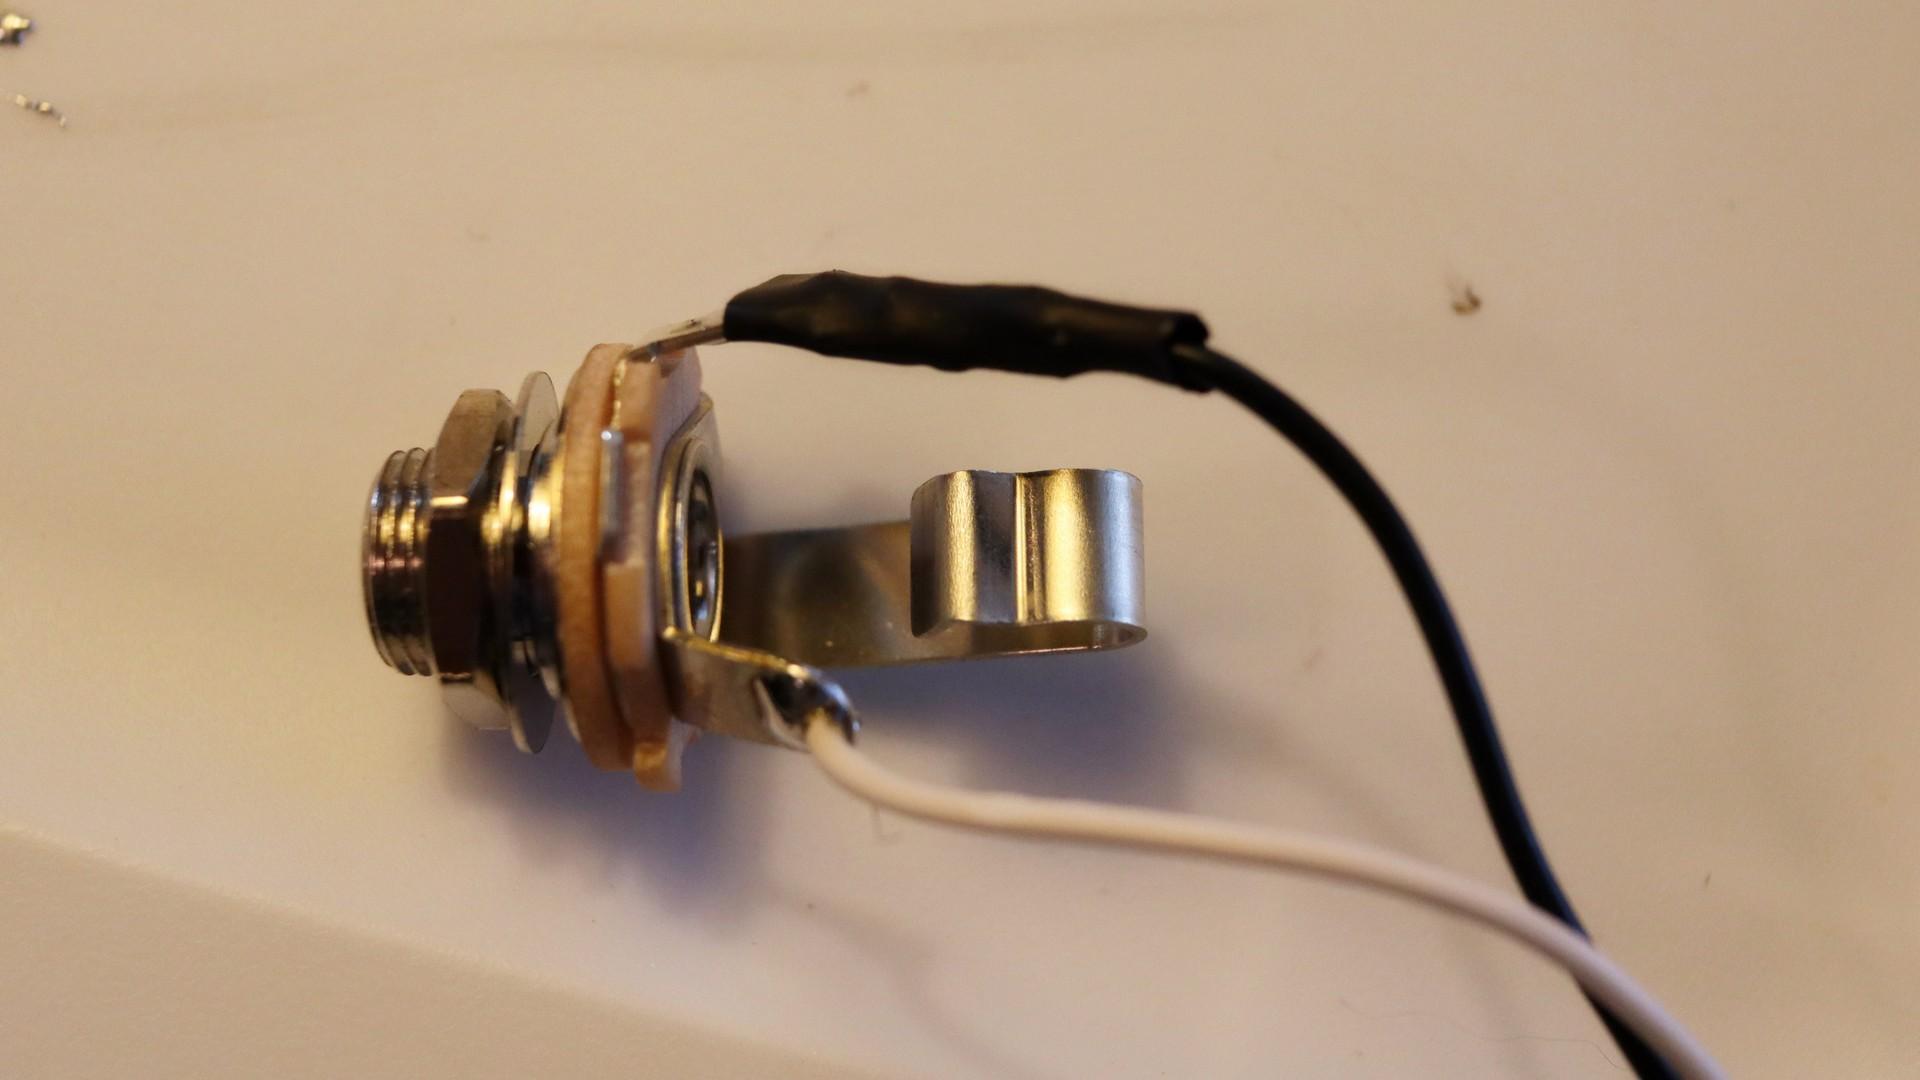
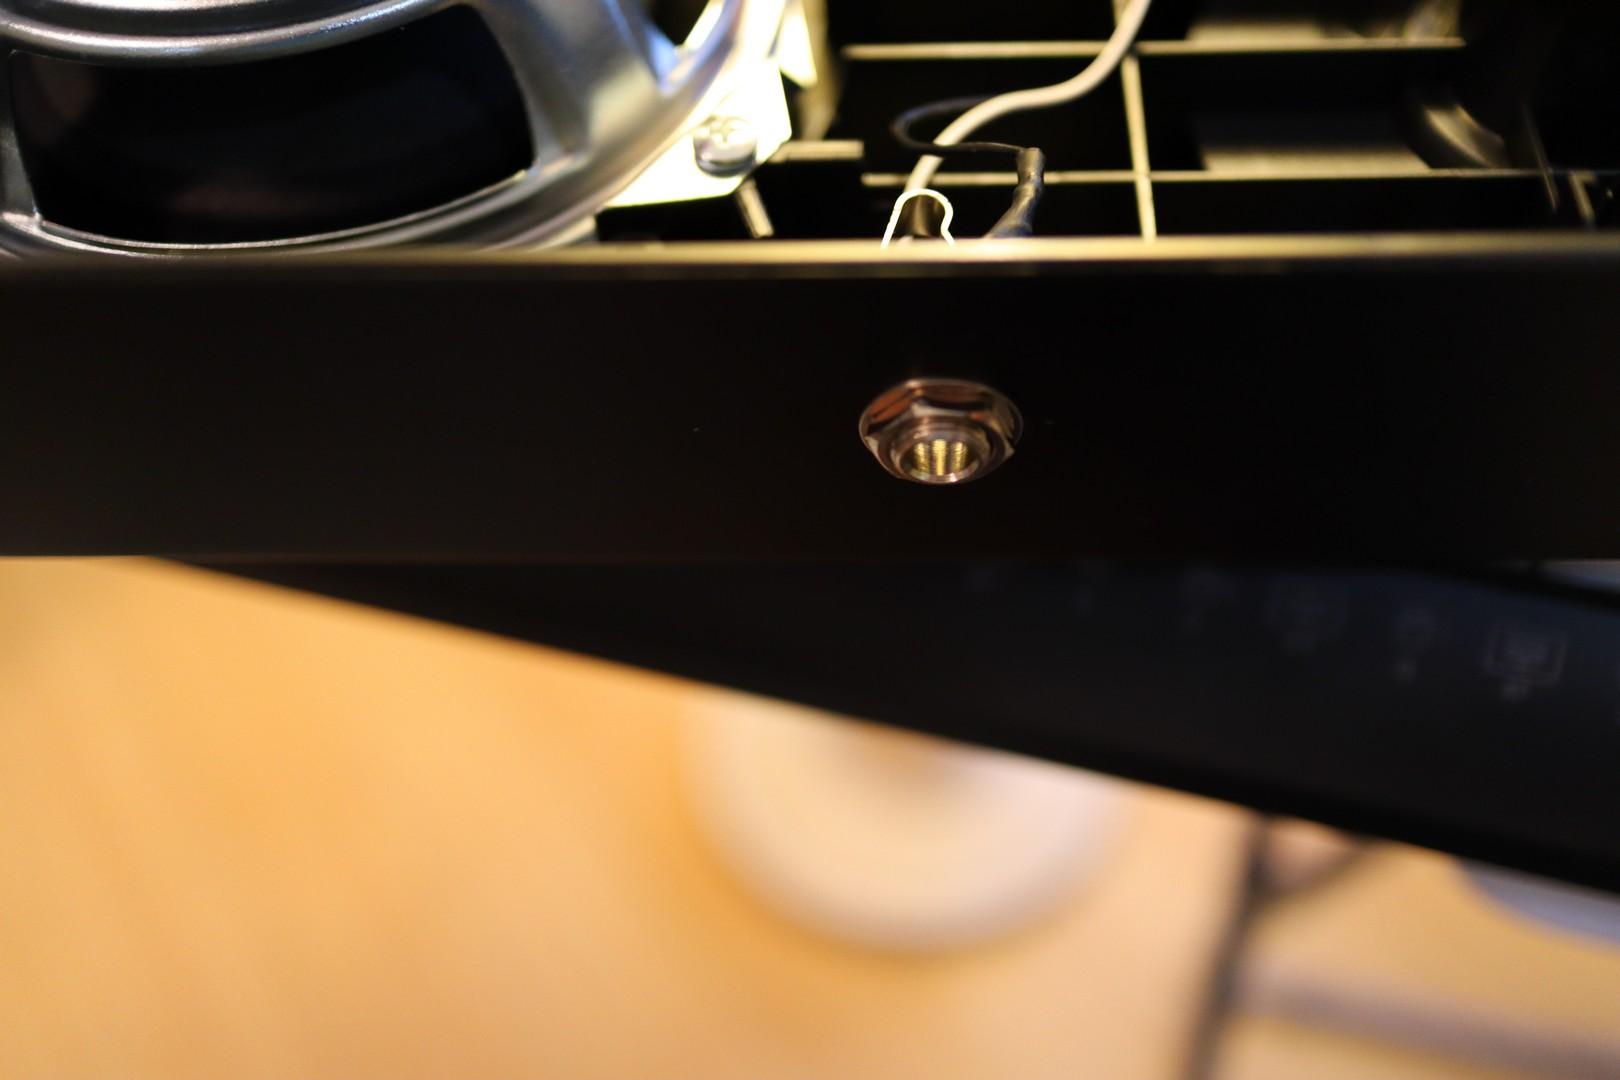
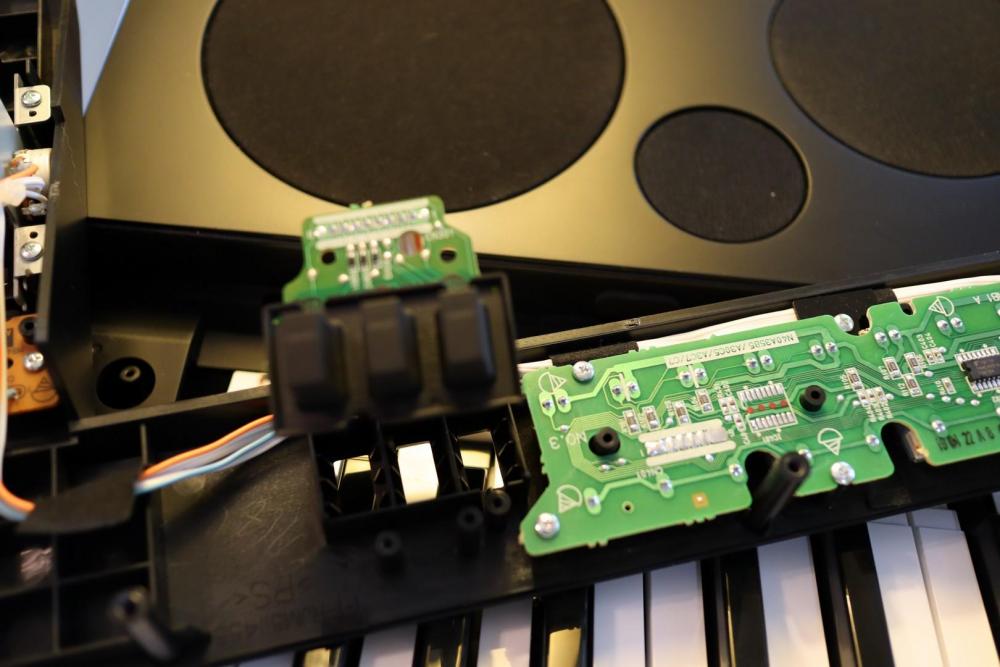
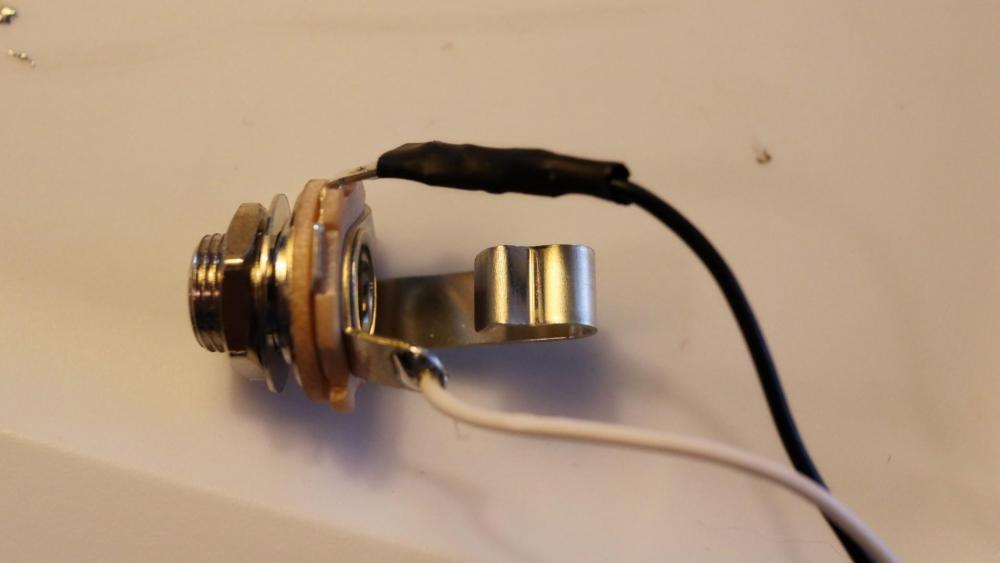
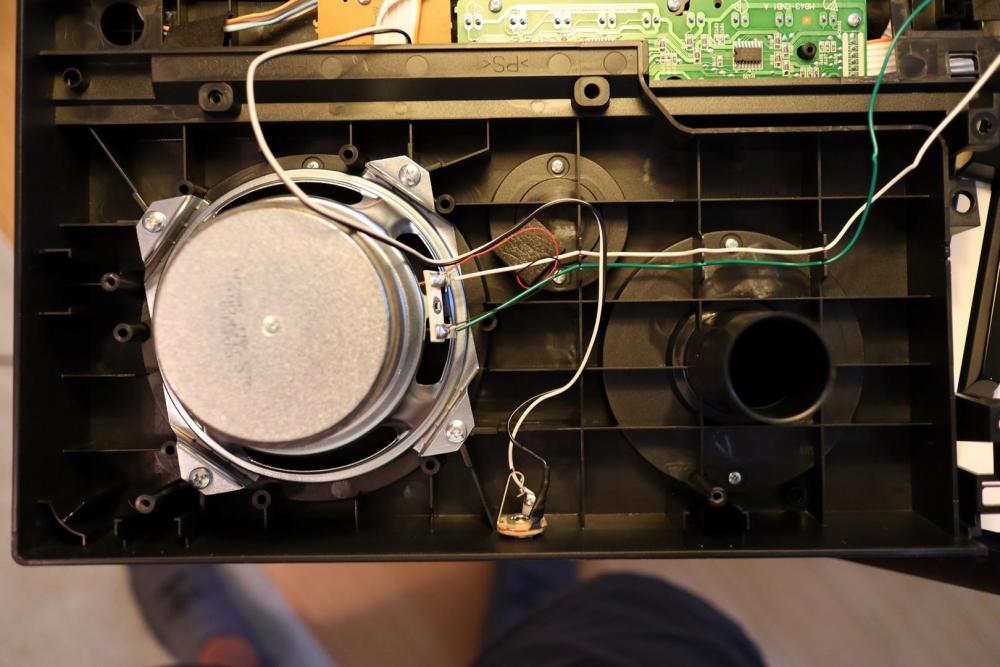
Here are the steps I followed to make this modification: 1. Flip the keyboard upside down and remove all of the visible screws. 2. Turn it back over and lift off the center section. 3. Remove screws holding the left top panel and lift it off. 4. remove screws holding the front section of this top panel to the main part. 5. Remove the 3 screws holding the circuit board to the front section of the panel. Picture 1 6. Flip over the circuit board and peel off the rubber switch buttons. Picture 2 7. Locate the two solder points that are connected to the slow/fast switch pads. Picture 3 8. Solder two wires about 1 foot long to the solder points. Picture 4 9. Solder the other ends of the wires to a 1/4" phone jack with a 1000 ohm resistor in series on one side. (polarity not important) Picture 5 10. Cover the resistor with heat shrink tubing or tape. Picture 6 11. Drill a hole in the back of the left speaker panel and mount the jack. Pictures 7 and 8 12. Plug in a sustain pedal to the jack and test that it works OK. Picture 9 13. Reassemble the keyboard in reverse order.


-
I enjoy the simulated Leslie on the WK-7600 but I do not like the location and operation of the rotary slow/fast switch. for me, it is awkward to find the button and press it on the fly while playing. I am used to a Hammond with a real Leslie and a lever type switch mounted on the front edge of the keyboard. (50 years ago) I had to open up my Casio 7600 to fix some noisy keys, so while I was at it, I decided to make provisions for an external rotary fast/slow switch. I found the correct points on the circuit board and soldered two wires across where the button touches the board. I connected these wires to a 1/4" jack with a 1000 ohm resistor in series. I drilled a hole in the back of the keyboard and mounted the jack there. I plugged in a sustain foot switch to the jack. Now I can use my foot to switch speeds without taking my hands off of the keys. It works great and does not affect the function of the original pushbutton. I can upload some photos and provide more details if anyone is interested.